- Get link
- X
- Other Apps
5 Healthy Cheesecake Ideas for a Guilt-Free Holiday Delight
Holiday gatherings are the perfect time to enjoy some sweet treats, but who wants to deal with a sugar crash afterwards? This collection of healthy cheesecake ideas will keep your festivities delicious and guilt-free, ensuring everyone leaves feeling happy and energized. Get ready to whip up some scrumptious, low-sugar desserts that everyone will love!
Zesty Lemon Ricotta Cheesecake To Brighten Your Holidays
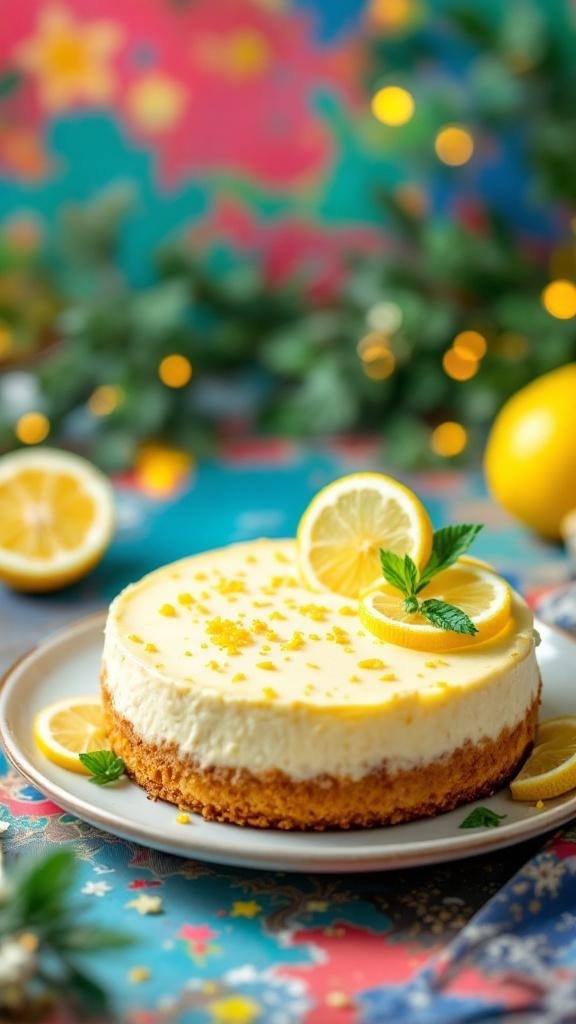
Brighten up your holiday gatherings with a Zesty Lemon Ricotta Cheesecake. This delightful dessert is not only visually appealing but also packed with refreshing flavors. The creamy ricotta blends beautifully with the zesty lemon, creating a light and airy cheesecake that everyone will love. The vibrant colors and festive decorations make it a perfect centerpiece for your holiday table.
The cheesecake features a crumbly crust that complements the smooth filling. Topped with fresh lemon slices and mint leaves, it’s a treat that feels indulgent without the sugar crash. This dessert is a wonderful way to enjoy the holiday season while keeping things light and healthy.
Ingredients
- 1 ½ cups graham cracker crumbs
- 1/4 cup melted coconut oil
- 2 cups ricotta cheese
- 1/2 cup Greek yogurt
- 1/2 cup honey or maple syrup
- 3 large eggs
- 1/4 cup fresh lemon juice
- 1 tablespoon lemon zest
- 1 teaspoon vanilla extract
- Fresh lemon slices and mint leaves for garnish
Instructions
- Preheat your oven to 350°F (175°C). Grease a 9-inch springform pan.
- In a bowl, mix graham cracker crumbs and melted coconut oil until well combined. Press the mixture into the bottom of the springform pan to form a crust.
- In a large mixing bowl, combine ricotta cheese, Greek yogurt, honey or maple syrup, eggs, lemon juice, lemon zest, and vanilla extract. Blend until smooth and creamy.
- Pour the filling over the crust in the springform pan. Bake for 40-45 minutes or until the center is set and slightly jiggly.
- Remove from the oven and let it cool to room temperature. Refrigerate for at least 4 hours or overnight for best results.
- Before serving, garnish with fresh lemon slices and mint leaves. Slice and enjoy your zesty lemon ricotta cheesecake!
Creamy Pumpkin Cheesecake For A Seasonal Delight

Fall is the perfect time to enjoy a creamy pumpkin cheesecake. This dessert captures the essence of the season with its rich flavors and smooth texture. The vibrant orange hue of the cheesecake is inviting, and the whipped cream topping adds a delightful touch. Surrounded by pumpkins and autumn leaves, this cheesecake is not just a treat for the taste buds but also a feast for the eyes.
Making this cheesecake is easier than you might think. The crust is typically made from crushed graham crackers, providing a sweet and crunchy base. The filling combines cream cheese, pumpkin puree, and warm spices like cinnamon and nutmeg, creating a comforting flavor profile. It’s a dessert that brings people together, making it perfect for holiday gatherings.
To keep it healthy, you can substitute traditional sugar with natural sweeteners. This way, you can enjoy the creamy goodness without the sugar crash that often follows indulgent treats. Serve it at your next holiday party, and watch it disappear!
Ingredients
- 1 ½ cups graham cracker crumbs
- ½ cup unsalted butter, melted
- 2 cups cream cheese, softened
- 1 cup pumpkin puree
- ¾ cup honey or maple syrup
- 3 large eggs
- 1 teaspoon vanilla extract
- 1 teaspoon ground cinnamon
- ½ teaspoon ground nutmeg
- ¼ teaspoon ground ginger
- ¼ teaspoon salt
- Whipped cream for topping
Instructions
- Preheat the oven to 325°F (160°C).
- In a bowl, mix graham cracker crumbs and melted butter until combined. Press the mixture into the bottom of a springform pan to form the crust.
- In a large mixing bowl, beat the cream cheese until smooth. Add pumpkin puree, honey (or maple syrup), eggs, vanilla, and spices. Mix until well combined.
- Pour the filling over the crust and smooth the top with a spatula.
- Bake for 50-60 minutes, or until the center is set but still slightly jiggly. Turn off the oven and let the cheesecake cool inside for an hour.
- Chill in the refrigerator for at least 4 hours or overnight before serving.
- Top with whipped cream and a sprinkle of cinnamon before enjoying.
Rich And Nutty Hazelnut Cheesecake To Impress Your Guests
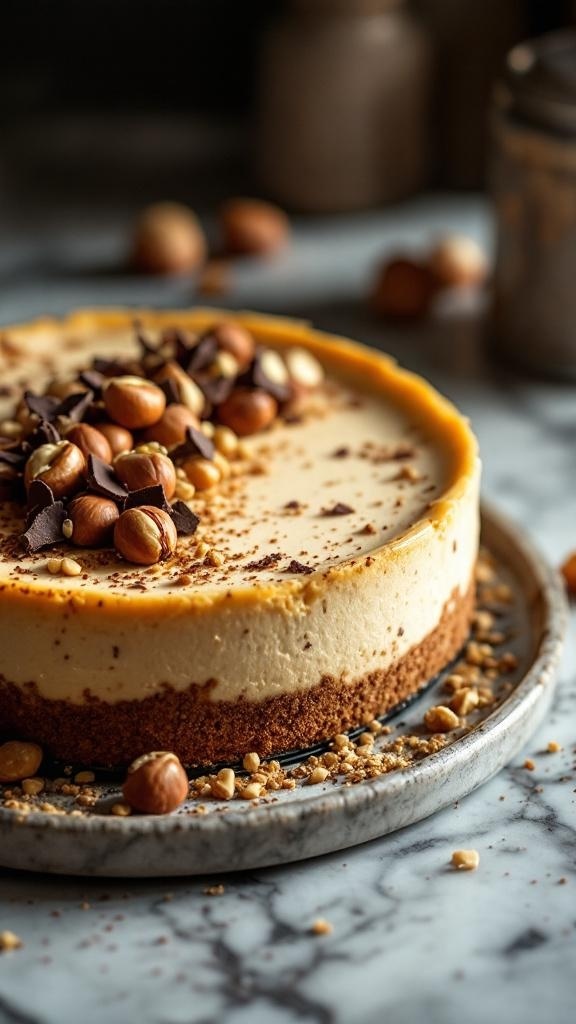
This hazelnut cheesecake is a showstopper for any holiday gathering. With its creamy texture and nutty flavor, it’s sure to impress your guests. The cheesecake sits on a crunchy crust that perfectly complements the rich filling. Topped with roasted hazelnuts and chocolate shavings, it’s both beautiful and delicious.
Making this cheesecake is easier than it looks. Start by preparing the crust, then whip up the filling. After baking, let it chill in the fridge for a few hours. This dessert is not just a treat for the eyes; it’s also a healthier option that won’t leave you feeling sluggish.
Serve it at your next holiday party, and watch as everyone comes back for seconds. It’s a delightful way to enjoy the festive season without the sugar crash!
Ingredients
- 1 ½ cups crushed graham crackers
- ½ cup unsalted butter, melted
- 1 cup hazelnuts, toasted and chopped
- 16 oz cream cheese, softened
- ½ cup Greek yogurt
- ½ cup honey or maple syrup
- 3 large eggs
- 1 teaspoon vanilla extract
- ¼ cup cocoa powder
- Chocolate shavings for topping
Instructions
- Preheat your oven to 350°F (175°C).
- In a bowl, mix crushed graham crackers with melted butter and half of the chopped hazelnuts. Press this mixture into the bottom of a springform pan to form the crust.
- In another bowl, beat the cream cheese until smooth. Add Greek yogurt, honey or maple syrup, eggs, vanilla extract, and cocoa powder. Mix until well combined.
- Pour the filling over the crust in the springform pan. Bake for 45-50 minutes or until the center is set.
- Let the cheesecake cool at room temperature, then refrigerate for at least 4 hours.
- Before serving, top with remaining chopped hazelnuts and chocolate shavings.
Dark Chocolate Raspberry Cheesecake For A Romantic Touch
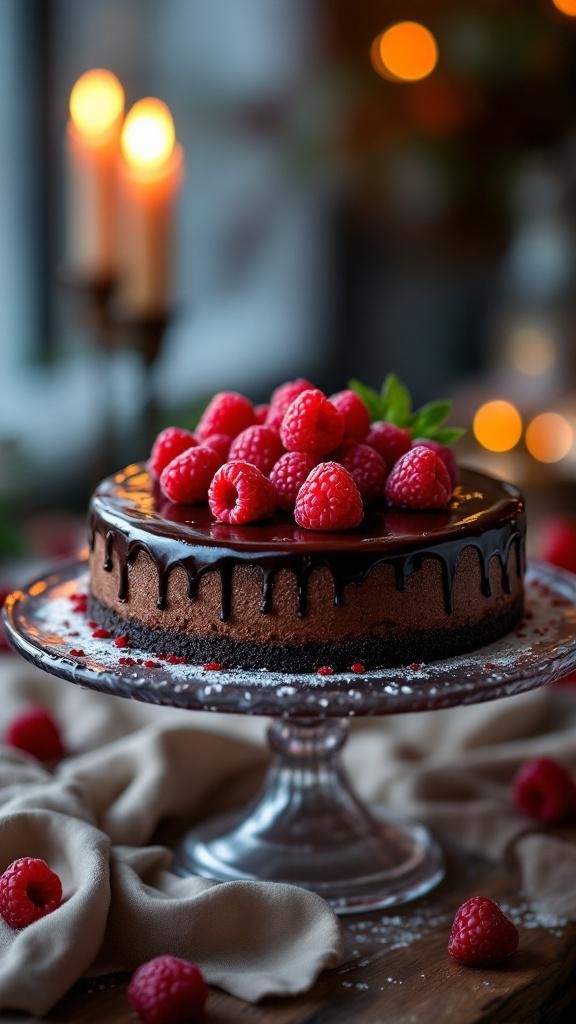
Picture this: a rich, dark chocolate cheesecake topped with vibrant raspberries. This dessert is not just a feast for the eyes; it’s a delightful treat that brings a romantic touch to any holiday gathering. The glossy chocolate glaze drips down the sides, while fresh raspberries add a pop of color and a hint of tartness. This cheesecake is perfect for sharing with someone special.
Using dark chocolate gives this cheesecake a deep, luxurious flavor, while the raspberries balance the richness with their natural sweetness. It’s a dessert that feels indulgent without the sugar crash that often follows traditional sweets. Plus, it’s easy to whip up, making it a great choice for busy holiday festivities.
Ingredients
- 1 ½ cups chocolate cookie crumbs
- ½ cup unsalted butter, melted
- 2 cups cream cheese, softened
- 1 cup dark chocolate, melted
- ¾ cup Greek yogurt
- ½ cup honey or maple syrup
- 3 large eggs
- 1 teaspoon vanilla extract
- 1 cup fresh raspberries
- Chocolate ganache for topping (optional)
Instructions
- Preheat the oven to 325°F (160°C). Grease a 9-inch springform pan.
- In a bowl, mix chocolate cookie crumbs with melted butter until combined. Press the mixture firmly into the bottom of the prepared pan to form the crust.
- In another bowl, beat the cream cheese until smooth. Gradually add the melted dark chocolate, Greek yogurt, honey or maple syrup, eggs, and vanilla extract. Mix until well combined.
- Pour the cheesecake filling over the crust and smooth the top. Bake for 50-60 minutes, or until the center is set but still slightly jiggly.
- Turn off the oven and leave the cheesecake inside for an hour. This helps prevent cracking.
- Remove from the oven and let it cool completely. Refrigerate for at least 4 hours, or overnight for best results.
- Before serving, top with fresh raspberries and drizzle with chocolate ganache if desired.
Maple Pecan Cheesecake For A Sweet Nutty Flavor
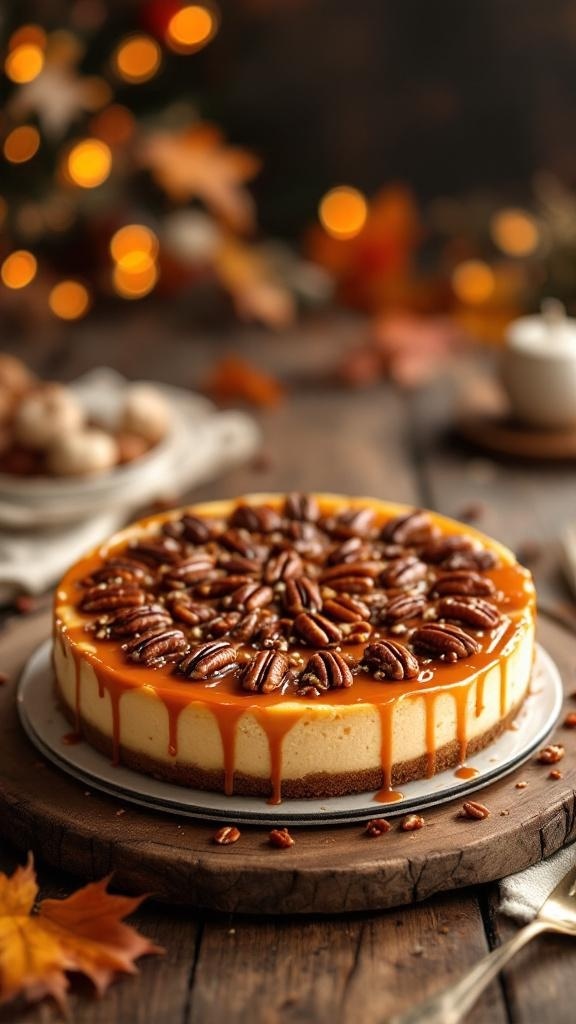
Maple Pecan Cheesecake brings a delightful twist to your holiday dessert table. The creamy texture pairs perfectly with the crunchy pecans and the rich maple flavor. This cheesecake not only looks stunning but also tastes amazing, making it a perfect choice for festive gatherings.
Imagine a smooth cheesecake topped with glossy maple syrup and toasted pecans. The warm, inviting colors and textures create a cozy vibe, perfect for the holidays. This dessert is sure to impress your guests while keeping the sugar crash at bay.
Let’s get into the details of making this delicious cheesecake!
Ingredients
- 1 ½ cups graham cracker crumbs
- ½ cup unsalted butter, melted
- 2 cups cream cheese, softened
- 1 cup maple syrup
- 3 large eggs
- 1 teaspoon vanilla extract
- 1 cup pecans, chopped
- ¼ teaspoon salt
- 1 cup caramel sauce (for drizzling)
Instructions
- Prepare the Crust: Preheat your oven to 350°F (175°C). In a bowl, mix graham cracker crumbs and melted butter until combined. Press this mixture into the bottom of a springform pan to form the crust.
- Make the Filling: In a large bowl, beat the cream cheese until smooth. Gradually add maple syrup, mixing well. Add eggs one at a time, followed by the vanilla extract and salt. Mix until creamy.
- Add Pecans: Fold in the chopped pecans gently into the cheesecake mixture.
- Bake: Pour the filling over the crust and smooth the top. Bake for 50-60 minutes until the center is set but still slightly jiggly. Turn off the oven and let the cheesecake cool inside for an hour.
- Chill: Remove from the oven and refrigerate for at least 4 hours, or overnight for best results.
- Serve: Before serving, drizzle caramel sauce over the top and garnish with whole pecans. Enjoy!
Struggling to Stay on Track with Your Eating?
You’re not alone. One of the biggest obstacles I see people
face is not knowing what to eat. Between busy schedules, endless diet
advice online, and trying to cook healthy meals that actually taste good—it’s
easy to feel stuck or overwhelmed.
That’s why I created my 21 Quick & Easy Custom
Low-Calorie Meal Plans Program. These plans are built specifically for
you—your goals, your lifestyle, and your food preferences. You won’t find
any cookie-cutter diets here. Just real, satisfying meals that help you stay
full, energized, and on track without the stress.
✅ No more guessing.
✅
No more skipping meals or eating “diet food” you hate.
✅
Just a clear, doable plan that fits your life.
👉 Ready to eat better,
feel better, and finally make progress? [Click here to get your custom meal plans today.]
Not Seeing the Inches Drop No Matter What You Do?
If you’re working out but still not seeing the results in
the mirror, I hear you. So many people come to me after months of doing cardio
or random workouts—and still struggling to lose inches or tone up. The truth
is, your body needs more than just movement. It needs a proven strategy.
My 8-Week Workout Program to Lose Inches is designed
to do just that—burn fat, tighten up, and give you visible results.
These workouts are fun, effective, and designed for real people with real
lives. Whether you’re getting back into fitness or ready to take it to the next
level, this program gives you a clear path to success.
✅ Just 8 weeks to build strength,
confidence, and a fitter shape.
✅
No endless cardio.
✅
No gym required (unless you want it).
👉 If you're ready to
drop inches and feel amazing in your own skin, [click here to start the 8-Week Workout Program].
Comments
Post a Comment