- Get link
- X
- Other Apps
10 Delicious Low Sugar Desserts for Weight Loss
Low-sugar desserts can be a delicious way to satisfy your sweet cravings without sabotaging your weight loss goals. This guide is packed with simple, mouthwatering recipes that make it easy to enjoy treats that are both healthy and satisfying. Whether you're a baking novice or a kitchen whiz, you'll find plenty of options to indulge your sweet tooth while keeping sugar intake in check.
Zesty Lemon Coconut Chia Pudding
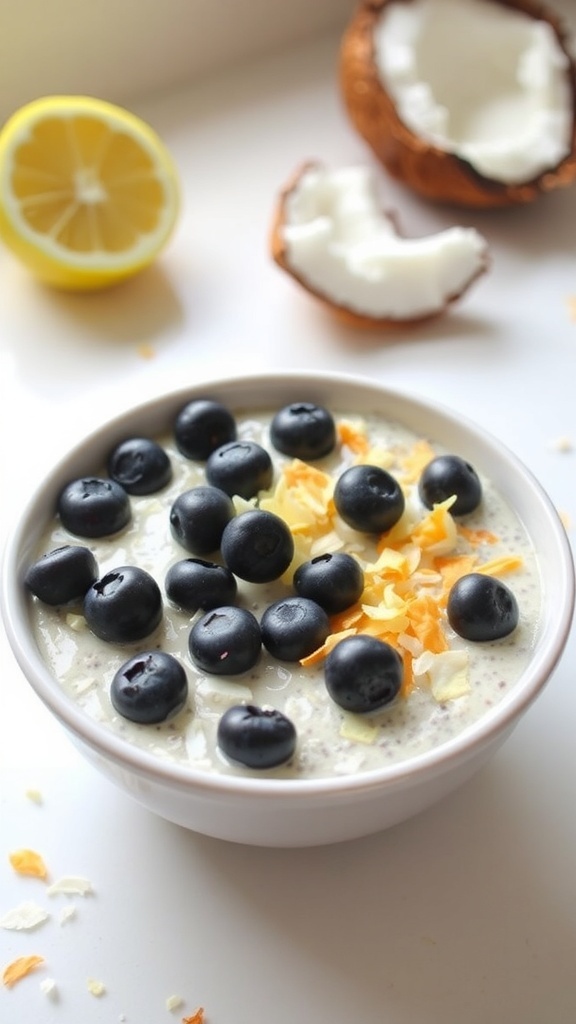
This Zesty Lemon Coconut Chia Pudding is a refreshing treat that’s perfect for anyone looking to enjoy a low sugar dessert. The combination of zesty lemon and creamy coconut creates a delightful flavor that’s both satisfying and guilt-free. Topped with fresh blueberries and a sprinkle of coconut flakes, it’s not just tasty but also visually appealing.
Chia seeds are a fantastic source of fiber and omega-3 fatty acids, making this pudding a nutritious choice. It’s easy to prepare and can be made ahead of time, making it a great option for busy days. Just mix the ingredients, let them sit, and you’ll have a delicious dessert ready to go!
Ingredients
- 1/4 cup chia seeds
- 1 cup unsweetened coconut milk
- 1 tablespoon honey or maple syrup (optional)
- Juice and zest of 1 lemon
- 1/2 teaspoon vanilla extract
- Fresh blueberries for topping
- Shredded coconut for garnish
Instructions
- In a bowl, combine chia seeds, coconut milk, honey or maple syrup, lemon juice, lemon zest, and vanilla extract. Stir well to combine.
- Cover the bowl and refrigerate for at least 4 hours or overnight. This allows the chia seeds to absorb the liquid and create a pudding-like texture.
- Once set, give the pudding a good stir. Serve in bowls topped with fresh blueberries and shredded coconut.
- Enjoy your refreshing and healthy dessert!
Decadent Dark Chocolate Almond Bark
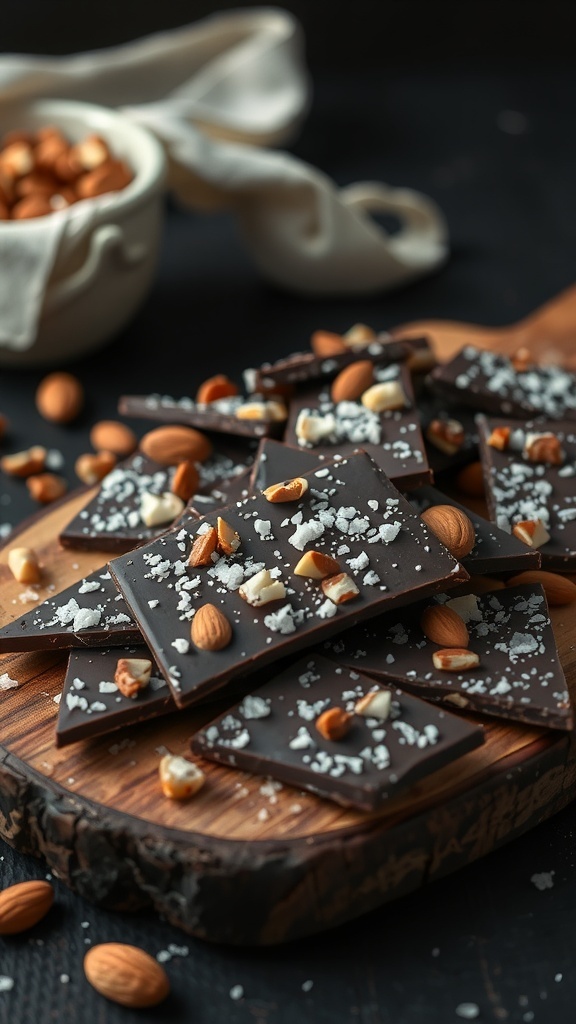
Dark chocolate almond bark is a delightful treat that satisfies your sweet tooth without the guilt. This dessert combines rich, dark chocolate with crunchy almonds, making it a perfect snack for those watching their sugar intake. The sprinkle of sea salt on top adds a nice contrast to the sweetness of the chocolate, enhancing the overall flavor.
The image showcases beautifully arranged pieces of dark chocolate almond bark, each topped with whole and chopped almonds. The rustic wooden board adds a warm touch, making the treat look even more inviting. This dessert is not only visually appealing but also easy to make, making it a great addition to your low-sugar dessert repertoire.
Making dark chocolate almond bark at home is simple and requires just a few ingredients. It’s a fantastic way to enjoy a sweet treat while keeping your sugar levels in check. Plus, it’s perfect for sharing or enjoying on your own!
Ingredients
- 2 cups dark chocolate chips (70% cocoa or higher)
- 1 cup almonds (whole and chopped)
- 1/4 teaspoon sea salt
Instructions
- Melt the Chocolate: In a microwave-safe bowl, melt the dark chocolate chips in 30-second intervals, stirring in between until smooth.
- Add the Almonds: Stir in the whole and chopped almonds until they are well coated with chocolate.
- Spread the Mixture: Line a baking sheet with parchment paper. Pour the chocolate-almond mixture onto the sheet and spread it out evenly.
- Sprinkle with Salt: Before the chocolate sets, sprinkle the sea salt over the top for added flavor.
- Chill: Place the baking sheet in the refrigerator for about 30 minutes or until the chocolate is firm.
- Break into Pieces: Once set, remove from the fridge and break the bark into pieces. Enjoy your homemade dark chocolate almond bark!
Classic Berry Crisp With Oat Topping
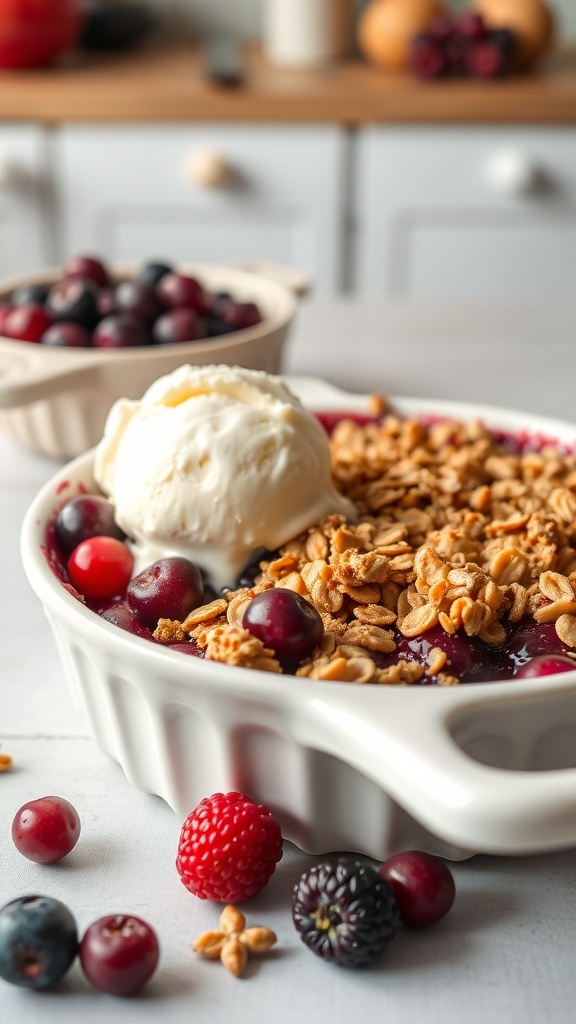
Berry crisp is a timeless dessert that combines the sweetness of fresh berries with a crunchy oat topping. This dish is not only delicious but also a healthier option for those watching their sugar intake. The vibrant colors of the berries make it visually appealing, and the warm, comforting aroma fills the kitchen as it bakes.
The combination of tart and sweet berries creates a delightful contrast, while the oat topping adds a satisfying crunch. It's perfect for any occasion, whether it's a family dinner or a casual gathering with friends. Serve it warm, topped with a scoop of low-sugar vanilla ice cream for an extra treat!
Ingredients
- 2 cups mixed berries (blueberries, raspberries, blackberries, cranberries)
- 1 tablespoon honey or maple syrup (optional)
- 1 cup rolled oats
- 1/2 cup almond flour
- 1/4 cup coconut oil, melted
- 1/4 teaspoon cinnamon
- 1/4 teaspoon salt
- 1/4 cup chopped nuts (optional)
Instructions
- Preheat the oven to 350°F (175°C).
- In a bowl, mix the berries with honey or maple syrup if using. Spread them evenly in a baking dish.
- In another bowl, combine rolled oats, almond flour, melted coconut oil, cinnamon, salt, and nuts if desired. Stir until well mixed.
- Sprinkle the oat mixture evenly over the berries.
- Bake for 25-30 minutes, or until the topping is golden brown and the berries are bubbling.
- Let it cool slightly before serving. Enjoy warm with a scoop of low-sugar ice cream!
Irresistible Banana Oatmeal Cookies
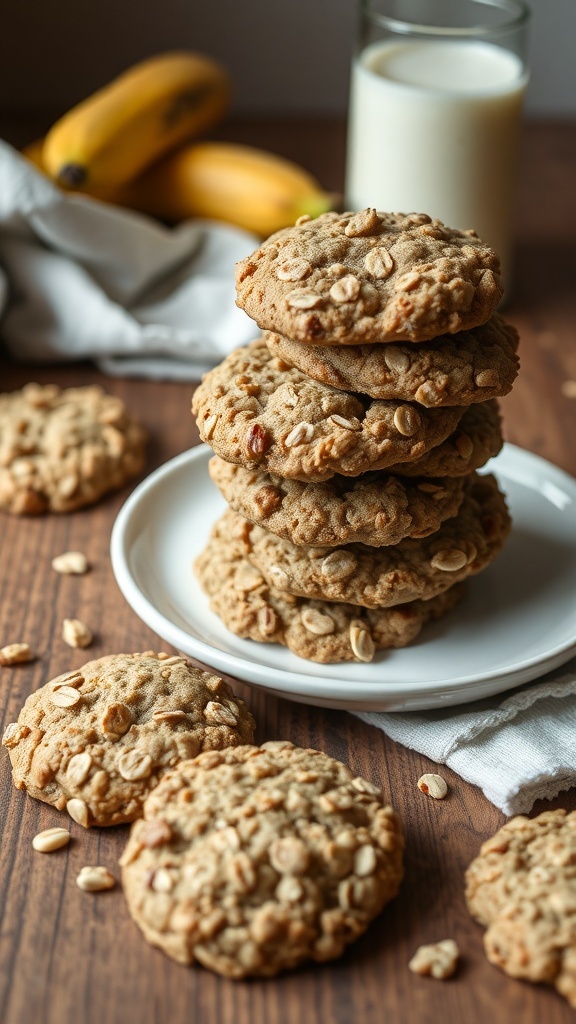
Banana oatmeal cookies are a delightful treat that blends the natural sweetness of bananas with the wholesome goodness of oats. These cookies are not only easy to make but also low in sugar, making them a perfect choice for anyone looking to satisfy their sweet tooth while keeping their health in check.
The image showcases a stack of golden-brown cookies, each dotted with oats, sitting on a simple white plate. Nearby, you can spot a glass of milk and some ripe bananas, hinting at the delicious ingredients used in this recipe. The warm, inviting colors of the cookies and the rustic wooden background create a cozy atmosphere, perfect for enjoying a sweet snack.
These cookies are a great way to use up overripe bananas. They are soft, chewy, and packed with flavor. Plus, they are a fantastic option for breakfast or an afternoon snack. Let’s get into how you can whip up a batch of these irresistible cookies!
Ingredients
- 2 ripe bananas, mashed
- 1 cup rolled oats
- 1/2 cup peanut butter or almond butter
- 1/4 cup honey or maple syrup
- 1/2 teaspoon vanilla extract
- 1/2 teaspoon baking soda
- 1/4 teaspoon salt
- 1/2 cup chocolate chips or nuts (optional)
Instructions
- Preheat the Oven: Preheat your oven to 350°F (175°C) and line a baking sheet with parchment paper.
- Mix Ingredients: In a mixing bowl, combine the mashed bananas, rolled oats, peanut butter, honey, vanilla extract, baking soda, and salt. Stir until well combined. If using, fold in chocolate chips or nuts.
- Scoop the Cookies: Using a spoon or cookie scoop, drop rounded tablespoons of the dough onto the prepared baking sheet, spacing them about 2 inches apart.
- Bake: Bake in the preheated oven for 10-12 minutes, or until the edges are lightly golden.
- Cool: Allow the cookies to cool on the baking sheet for a few minutes before transferring them to a wire rack to cool completely.
Nutty Date Energy Bites
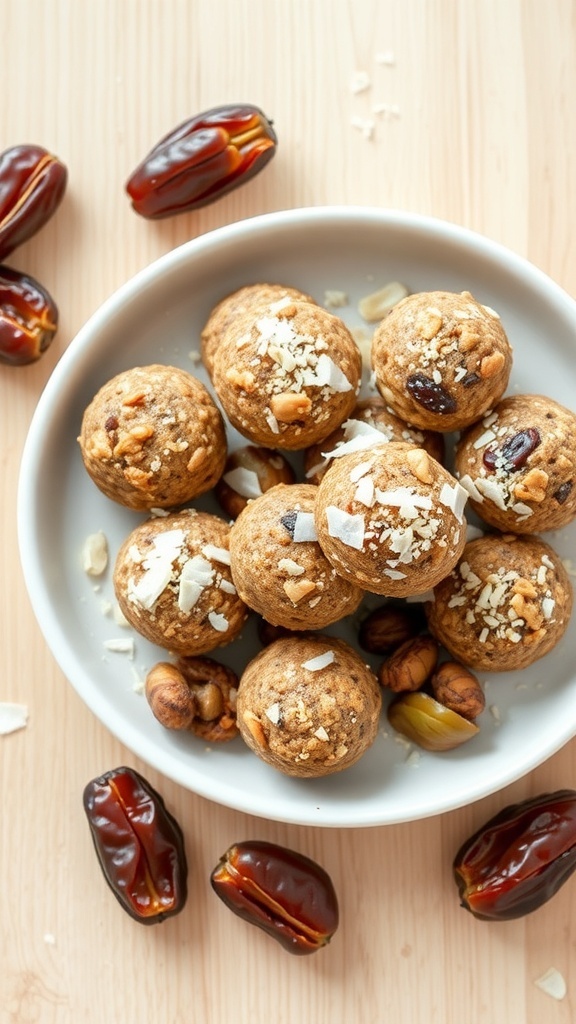
Nutty Date Energy Bites are a fantastic treat for anyone looking to satisfy their sweet tooth without the added sugar. These little bites are packed with wholesome ingredients, making them perfect for a quick snack or a post-workout boost. The image showcases a delightful bowl filled with these energy bites, surrounded by fresh dates and nuts, highlighting their natural goodness.
These energy bites are not only tasty but also easy to make. The combination of dates and nuts provides a rich source of energy, fiber, and healthy fats. You can enjoy these bites guilt-free while staying on track with your weight loss goals.
Let’s get into how you can whip up a batch of these delicious Nutty Date Energy Bites!
Ingredients
- 1 cup pitted dates
- 1/2 cup mixed nuts (almonds, walnuts, or cashews)
- 1/4 cup rolled oats
- 2 tablespoons unsweetened cocoa powder (optional)
- 1 tablespoon chia seeds
- 1/4 cup shredded coconut (for rolling)
- Pinch of salt
Instructions
- Prepare the Mixture: In a food processor, combine the pitted dates, mixed nuts, rolled oats, cocoa powder, chia seeds, and salt. Pulse until the mixture is well combined and sticky.
- Form the Bites: Using your hands, take small portions of the mixture and roll them into bite-sized balls.
- Coat with Coconut: Roll each ball in shredded coconut to give them a nice finish and added flavor.
- Chill: Place the energy bites in the fridge for about 30 minutes to firm up.
- Enjoy: Serve chilled or at room temperature. Store any leftovers in an airtight container in the fridge.
Decadent Keto Cheesecake Bars
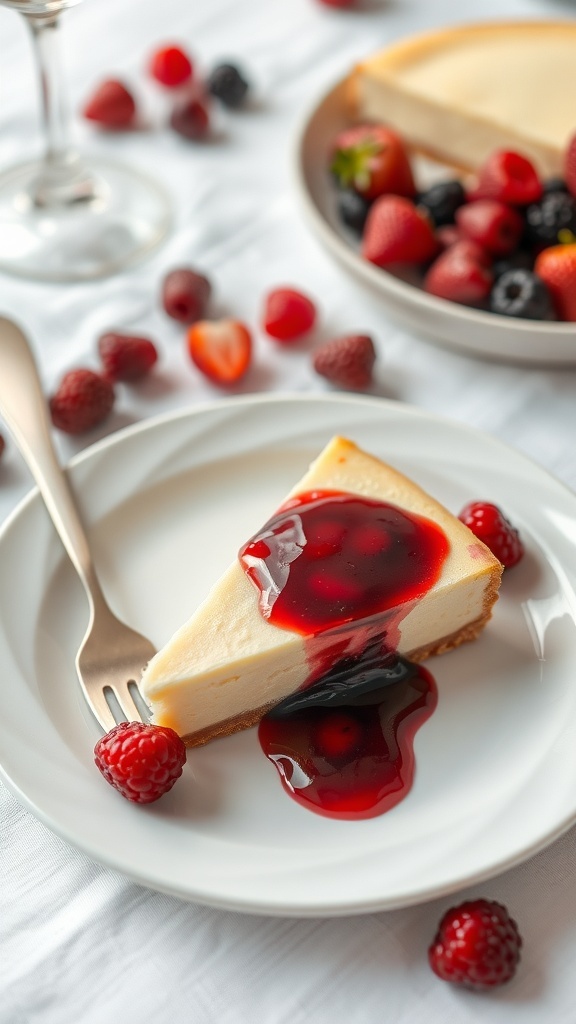
If you’re looking for a sweet treat that won’t derail your weight loss goals, these keto cheesecake bars are a fantastic choice. They’re rich and creamy, with a delightful crust that complements the smooth filling. Topped with a berry sauce, they look as good as they taste!
The image showcases a slice of cheesecake on a plate, drizzled with a vibrant berry sauce. Fresh raspberries and strawberries surround the plate, adding a pop of color and freshness. This dessert is not just visually appealing; it’s also low in sugar and perfect for those following a keto diet.
Making these bars is simple and requires just a few ingredients. You’ll love how easy it is to whip up a batch for a special occasion or just a cozy night in.
Ingredients
- 2 cups almond flour
- 1/4 cup melted butter
- 1/4 cup erythritol (or sweetener of choice)
- 1/2 teaspoon vanilla extract
- 16 oz cream cheese, softened
- 1/2 cup sour cream
- 1/2 cup erythritol
- 3 large eggs
- 1 teaspoon vanilla extract
- 1/4 cup lemon juice
Instructions
- Preheat your oven to 350°F (175°C). Grease an 8x8 inch baking dish.
- In a bowl, mix almond flour, melted butter, 1/4 cup erythritol, and 1/2 teaspoon vanilla extract until combined. Press this mixture into the bottom of the prepared baking dish to form the crust.
- Bake the crust for about 10 minutes or until lightly golden. Remove from the oven and let it cool.
- In a large bowl, beat the softened cream cheese until smooth. Add sour cream, 1/2 cup erythritol, eggs, 1 teaspoon vanilla extract, and lemon juice. Mix until well combined.
- Pour the cream cheese mixture over the cooled crust. Bake for 25-30 minutes, or until the center is set.
- Let the cheesecake cool completely, then refrigerate for at least 4 hours before slicing into bars.
- Serve with fresh berries and enjoy your guilt-free dessert!
Satisfying Apple Cinnamon Muffins
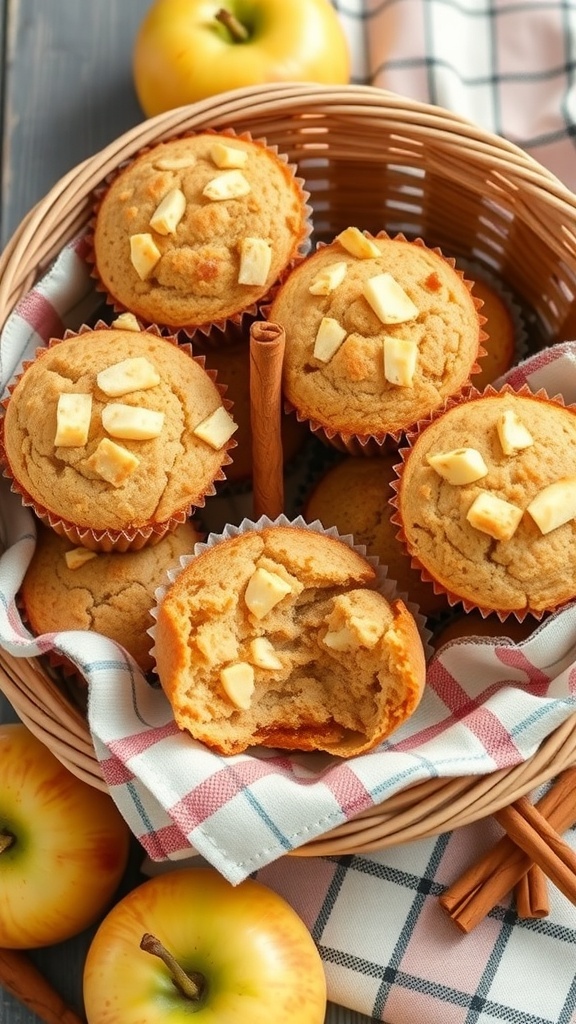
These apple cinnamon muffins are a delightful treat that fits perfectly into a low-sugar diet. They are soft, fluffy, and packed with the warm flavors of cinnamon and fresh apples. The muffins are not only delicious but also a great option for those looking to satisfy their sweet tooth without the added sugar. You can enjoy them as a snack or a quick breakfast on the go.
The muffins are topped with small chunks of apple, giving each bite a burst of fruity goodness. The aroma of cinnamon wafts through the kitchen as they bake, making it hard to resist having just one. They are easy to make and perfect for meal prep, so you can have a healthy snack ready whenever you need it.
Here’s how you can whip up these tasty muffins in no time!
Ingredients
- 1 ½ cups whole wheat flour
- ½ cup unsweetened applesauce
- ¼ cup honey or maple syrup
- 1 teaspoon baking powder
- 1 teaspoon baking soda
- 1 teaspoon ground cinnamon
- ½ teaspoon salt
- 1 large egg
- ½ cup unsweetened almond milk
- 1 cup diced apples (about 1 medium apple)
- ½ teaspoon vanilla extract
Instructions
- Preheat your oven to 350°F (175°C) and line a muffin tin with paper liners.
- In a large bowl, mix the flour, baking powder, baking soda, cinnamon, and salt.
- In another bowl, whisk together the applesauce, honey (or maple syrup), egg, almond milk, and vanilla extract.
- Combine the wet ingredients with the dry ingredients, stirring until just mixed. Gently fold in the diced apples.
- Divide the batter evenly among the muffin cups, filling each about ¾ full.
- Bake for 18-20 minutes, or until a toothpick inserted in the center comes out clean.
- Let the muffins cool in the pan for a few minutes before transferring them to a wire rack to cool completely.
Creamy Peanut Butter Chocolate Cups

These creamy peanut butter chocolate cups are a delightful treat that fits perfectly into your low sugar dessert plan. They are rich, satisfying, and oh-so-easy to make. The combination of smooth peanut butter and chocolate creates a flavor that many love, making these cups a favorite for anyone looking to indulge without the guilt.
The image showcases a tempting array of chocolate cups, each with a glossy finish. Some are whole, while one is cut in half, revealing the creamy peanut butter center. This visual is enough to make anyone crave a bite!
Making these cups is simple. You can enjoy them as a snack or dessert, and they are great for meal prep. Just keep them in the fridge, and you’ll have a sweet treat ready whenever you need it.
Ingredients
- 1 cup dark chocolate chips
- 1/2 cup natural peanut butter
- 2 tablespoons honey or maple syrup (optional for sweetness)
- 1/4 teaspoon salt
- Mini cupcake liners
Instructions
- Melt the chocolate chips in a microwave-safe bowl in 30-second intervals, stirring in between until smooth.
- Line a mini muffin tin with cupcake liners.
- Spoon a small amount of melted chocolate into each liner, just enough to cover the bottom.
- In a separate bowl, mix the peanut butter, honey (if using), and salt until smooth.
- Place a dollop of the peanut butter mixture on top of the chocolate in each liner.
- Cover the peanut butter with more melted chocolate, ensuring it’s fully sealed.
- Refrigerate for about 30 minutes or until the chocolate is set.
- Enjoy your creamy peanut butter chocolate cups!
Light And Fluffy Vanilla Bean Panna Cotta

This Light and Fluffy Vanilla Bean Panna Cotta is a delightful treat that fits perfectly into a low-sugar lifestyle. The creamy texture and subtle sweetness make it a favorite among dessert lovers. Topped with fresh raspberries and mint, it’s not just tasty but also visually appealing.
Panna cotta is an Italian dessert that translates to 'cooked cream.' It’s simple to make and requires minimal ingredients. The vanilla bean adds a rich flavor that elevates the dish. Plus, it’s a fantastic option for those looking to satisfy their sweet tooth without the guilt.
To make this panna cotta, you’ll need some basic ingredients like heavy cream, milk, gelatin, and vanilla bean. The process involves heating the cream and milk, dissolving the gelatin, and letting it set in the fridge. It’s that easy!
Serve it chilled, garnished with fresh raspberries and a sprig of mint for a refreshing finish. This dessert is perfect for any occasion, whether it’s a dinner party or a quiet night in.
Ingredients
- 2 cups heavy cream
- 1 cup whole milk
- 1/4 cup granulated sugar (or a sugar substitute)
- 1 tablespoon gelatin powder
- 1 vanilla bean, split and scraped
- Fresh raspberries for topping
- Fresh mint leaves for garnish
Instructions
- In a saucepan, combine the heavy cream, milk, and sugar. Heat over medium heat until the sugar dissolves and the mixture is warm.
- Sprinkle the gelatin over 3 tablespoons of cold water in a small bowl. Let it sit for about 5 minutes to bloom.
- Add the bloomed gelatin to the warm cream mixture and stir until fully dissolved.
- Stir in the vanilla bean seeds and the pod into the mixture. Remove from heat and let it cool slightly.
- Pour the mixture into serving glasses and refrigerate for at least 4 hours, or until set.
- Once set, top with fresh raspberries and mint leaves before serving.
Spiced Pumpkin Pie Bites
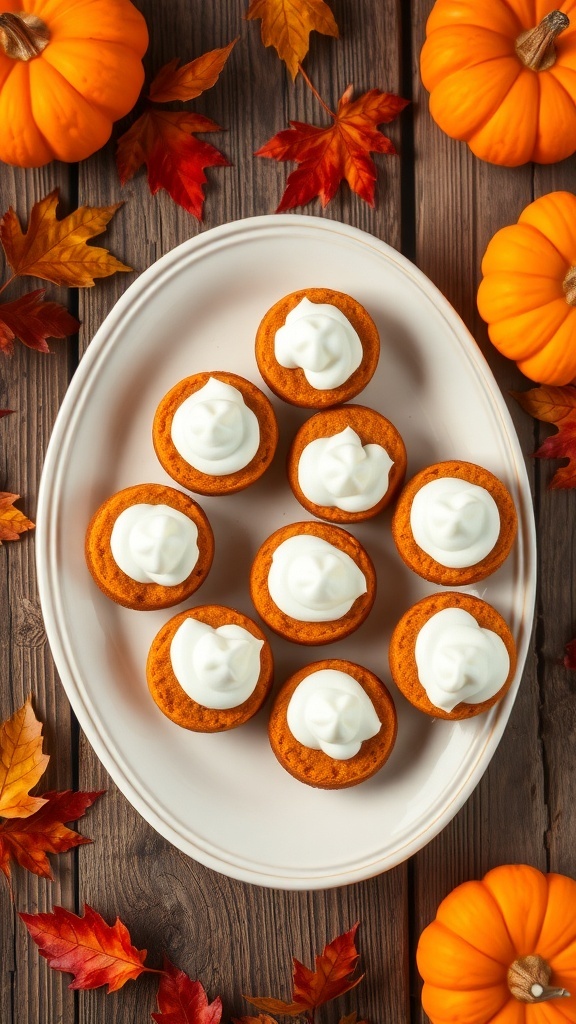
Spiced Pumpkin Pie Bites are a delightful treat that brings the flavors of fall right to your table. These mini desserts are perfect for satisfying your sweet tooth without the guilt. Each bite is packed with pumpkin goodness and warm spices, making them a cozy addition to any gathering.
The image showcases these adorable bites, beautifully arranged on a plate. They feature a golden crust filled with a smooth pumpkin filling, topped with a dollop of whipped cream. The vibrant orange of the pumpkin contrasts nicely with the warm tones of the plate and the rustic wooden background. Surrounding the plate are small pumpkins and autumn leaves, enhancing the seasonal vibe.
These bites are not only tasty but also easy to make. They are a great option for anyone looking to enjoy low-sugar desserts while still indulging in seasonal flavors. Let’s jump into the recipe!
Ingredients
- 1 package of pre-made pie crusts (2 crusts)
- 1 cup canned pumpkin puree
- 1/2 cup sweetened condensed milk
- 1/4 cup brown sugar
- 1 teaspoon ground cinnamon
- 1/2 teaspoon ground nutmeg
- 1/4 teaspoon ground ginger
- 1/4 teaspoon salt
- 1 large egg
- Whipped cream for serving (optional)
Instructions
- Preheat the Oven: Preheat your oven to 375°F (190°C).
- Prepare the Crust: Roll out the pie crusts on a lightly floured surface. Use a round cutter to cut out circles and fit them into a mini muffin tin.
- Make the Filling: In a mixing bowl, combine the pumpkin puree, sweetened condensed milk, brown sugar, cinnamon, nutmeg, ginger, salt, and egg. Mix until smooth and well combined.
- Fill the Crusts: Spoon the pumpkin filling into each pie crust, filling them about 3/4 full.
- Bake: Bake in the preheated oven for 15-20 minutes, or until the filling is set and the crust is lightly golden.
- Cool and Serve: Allow the bites to cool slightly before removing them from the muffin tin. Serve warm or at room temperature, topped with whipped cream if desired.
Comments
Post a Comment