- Get link
- X
- Other Apps
10 High-Protein Healthy Snacks for Effective Weight Loss
Snacking doesn’t have to sabotage your weight loss goals! In fact, high-protein snacks can keep you feeling full longer and help you maintain energy throughout the day. Here’s a rundown of some tasty, nutritious options that’ll support your journey without compromising flavor.
Nutty Protein-Packed Energy Bites

Nutty protein-packed energy bites are a fantastic snack for anyone looking to maintain a healthy diet while enjoying something delicious. These little balls of goodness are filled with nuts, seeds, and natural sweeteners, making them perfect for a quick energy boost. They are easy to make and can be customized to fit your taste preferences.
The image showcases a delightful arrangement of energy bites, sprinkled with coconut and topped with nuts. They sit on a rustic wooden board, surrounded by almonds and mint leaves, giving a fresh and inviting feel. This snack not only looks appealing but is also packed with protein, making it a great option for weight loss.
These energy bites are perfect for on-the-go snacking or a post-workout treat. They provide a satisfying crunch and a burst of flavor that keeps you coming back for more. Plus, they are a healthier alternative to sugary snacks that can derail your weight loss goals.
Ingredients
- 1 cup rolled oats
- 1/2 cup almond butter
- 1/4 cup honey or maple syrup
- 1/2 cup mixed nuts (almonds, walnuts, cashews)
- 1/4 cup chia seeds
- 1/4 cup shredded coconut
- 1 teaspoon vanilla extract
- Pinch of salt
Instructions
- Mix Ingredients: In a large bowl, combine rolled oats, almond butter, honey, mixed nuts, chia seeds, shredded coconut, vanilla extract, and salt. Stir until everything is well combined.
- Form Bites: Using your hands, roll the mixture into small balls, about 1 inch in diameter.
- Chill: Place the energy bites on a baking sheet lined with parchment paper. Refrigerate for at least 30 minutes to firm up.
- Store: Once chilled, transfer the bites to an airtight container. They can be stored in the fridge for up to a week.
Savory Greek Yogurt Parfaits
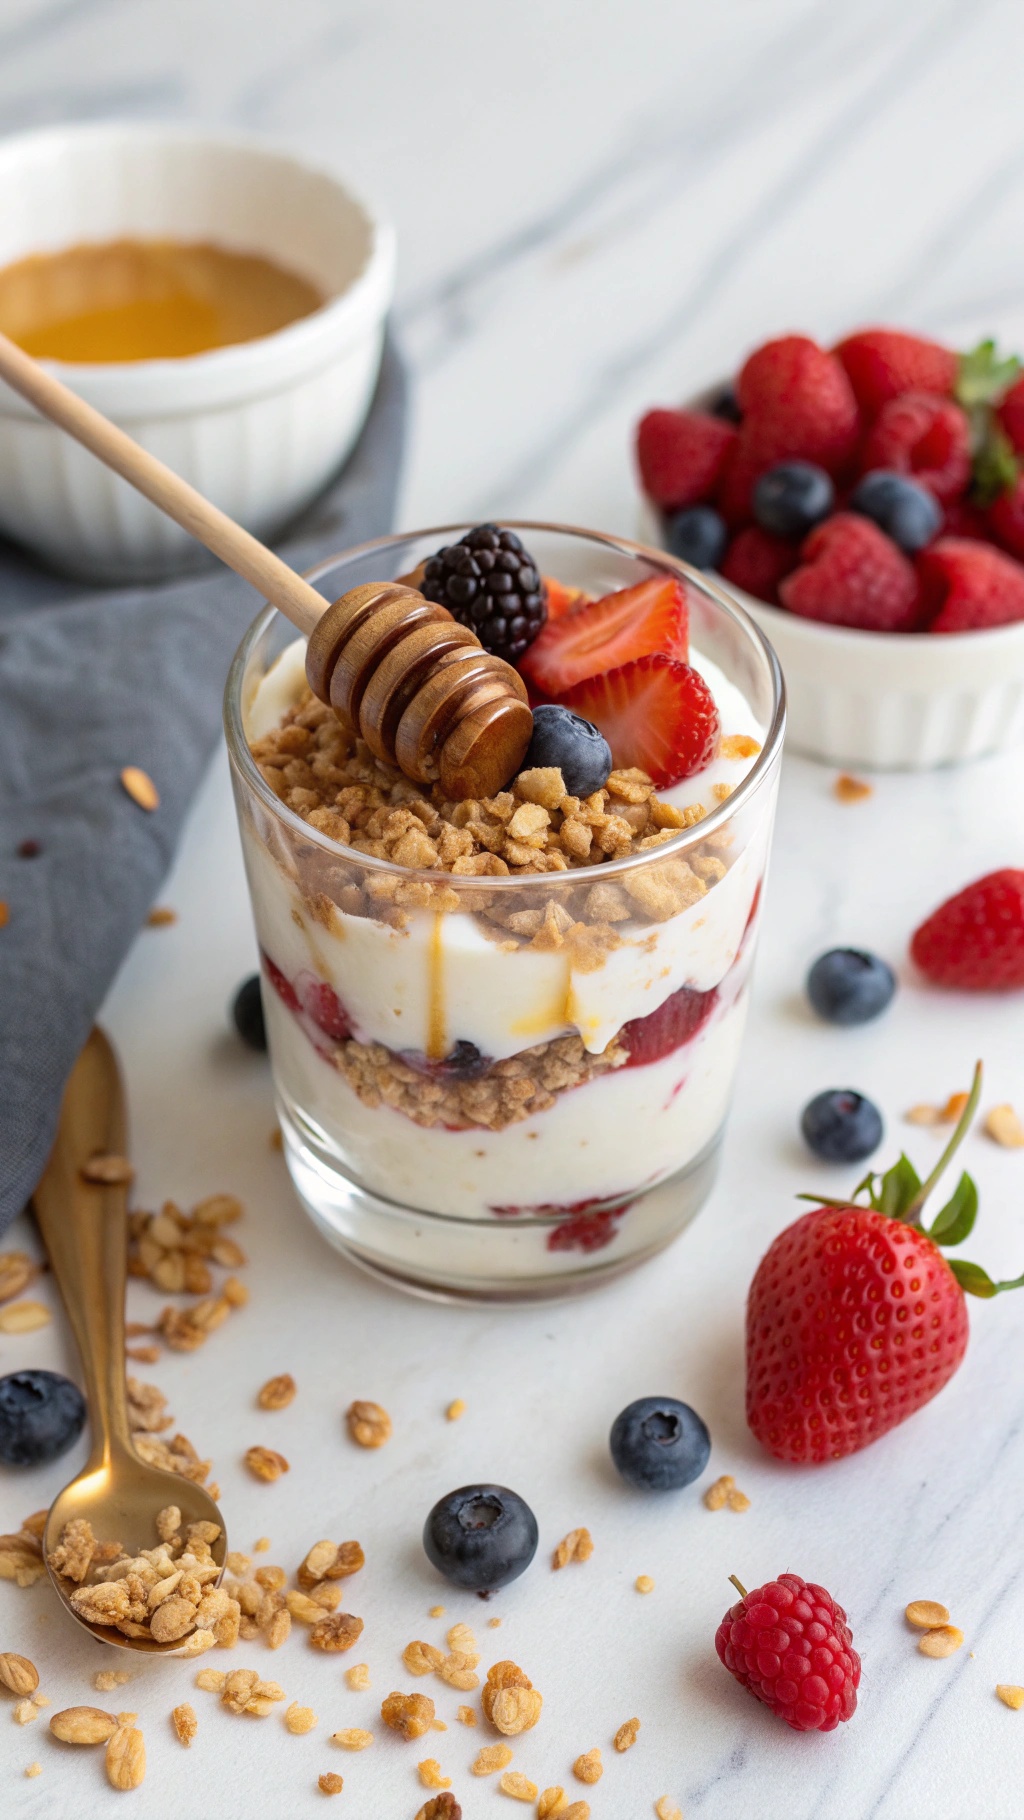
Greek yogurt parfaits are a fantastic way to enjoy a healthy snack while keeping things interesting. These parfaits are not just for breakfast; they make a great snack any time of the day. The creamy texture of Greek yogurt pairs perfectly with fresh fruits and crunchy granola, creating a delightful mix of flavors and textures.
In the image, you can see a beautifully layered parfait. It features layers of Greek yogurt, vibrant berries like strawberries, blueberries, and blackberries, and a sprinkle of granola on top. A drizzle of honey adds a touch of sweetness, making it a satisfying treat. This snack is high in protein, which is essential for weight loss and muscle maintenance.
Making your own parfaits is simple and allows for customization. You can choose your favorite fruits and adjust the sweetness to your liking. Plus, it’s a fun way to incorporate more fruits into your diet!
Ingredients
- 2 cups Greek yogurt
- 1 cup mixed berries (strawberries, blueberries, blackberries)
- 1/2 cup granola
- 2 tablespoons honey
- 1 teaspoon vanilla extract (optional)
Instructions
- Prepare the Yogurt: In a bowl, mix Greek yogurt with vanilla extract if using. This adds a nice flavor.
- Layer the Ingredients: In a glass or bowl, start with a layer of Greek yogurt. Then add a layer of mixed berries followed by a layer of granola.
- Repeat Layers: Continue layering until you reach the top of the glass. Finish with a layer of yogurt and top with more berries and granola.
- Add Honey: Drizzle honey over the top for added sweetness.
- Serve: Enjoy immediately or refrigerate for a short time before serving.
Flavorful Hummus And Veggie Dippers
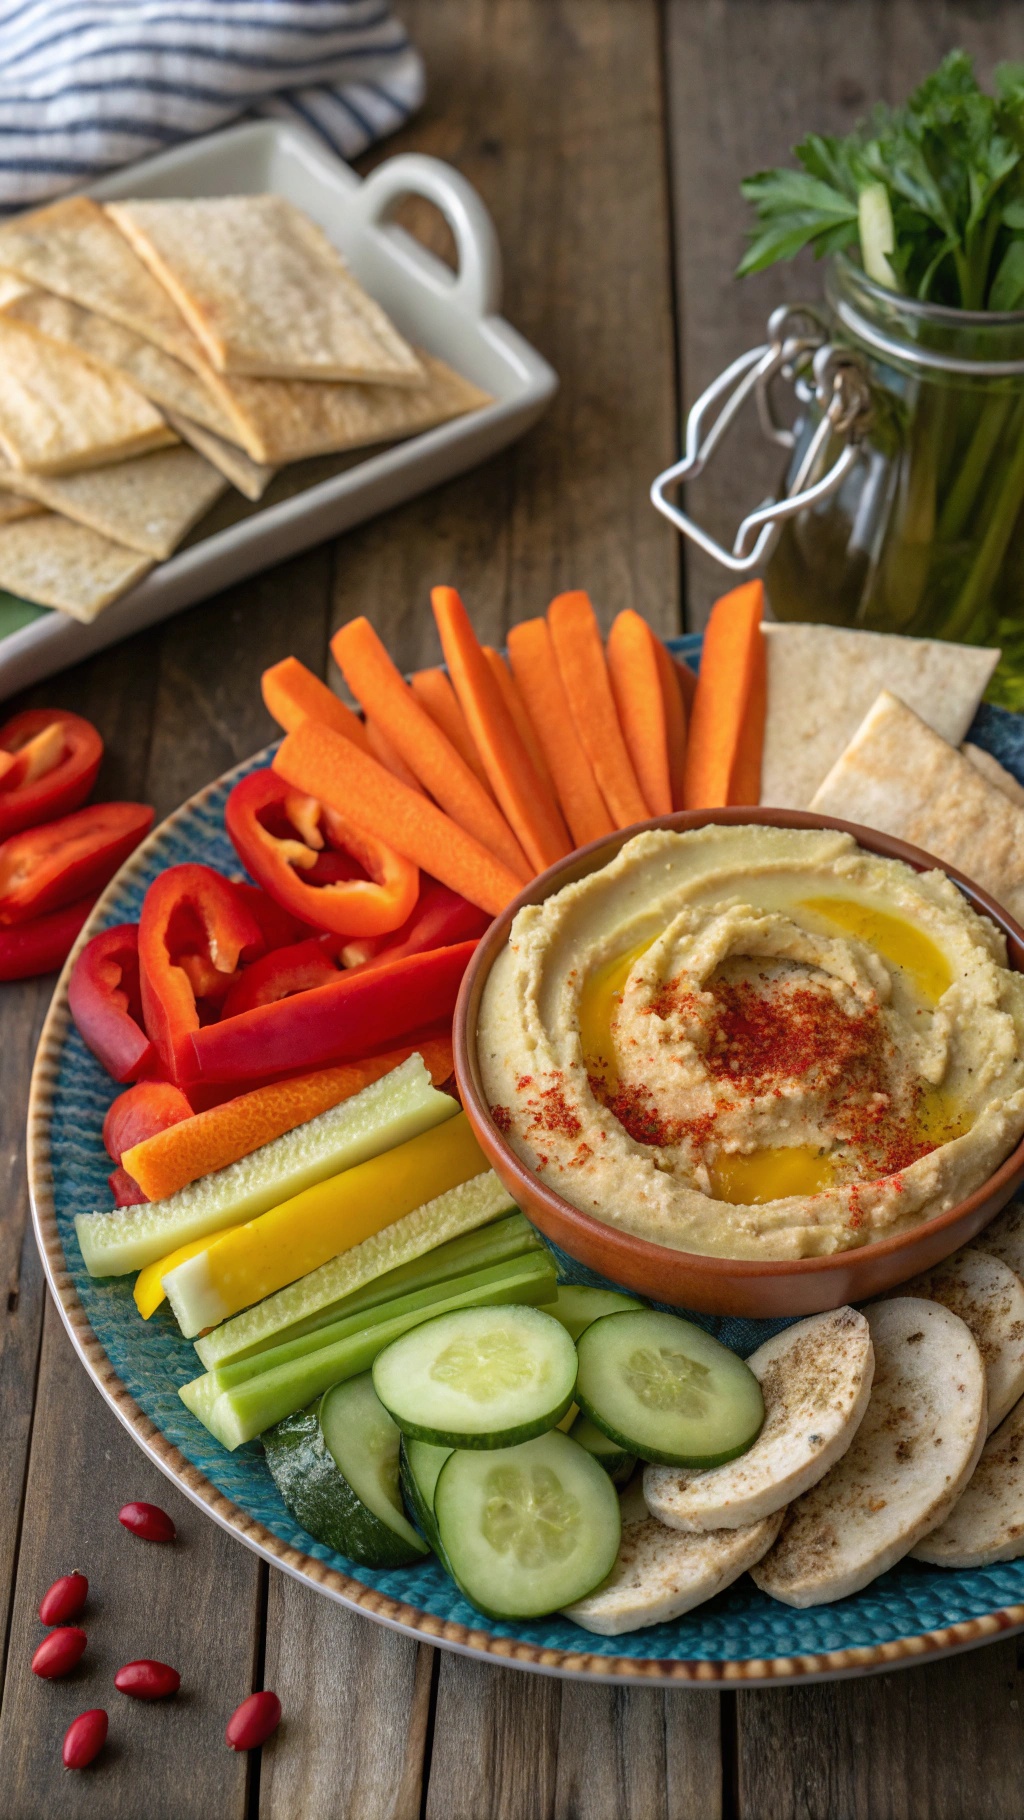
Hummus and veggie dippers make a fantastic snack for anyone looking to shed some pounds while enjoying delicious flavors. This colorful platter showcases a creamy bowl of hummus surrounded by fresh, crunchy vegetables. Think of vibrant bell peppers, crisp cucumbers, and sweet carrots, all ready to be dipped. Not only does this snack look appealing, but it’s also packed with protein and fiber, keeping you full and satisfied.
Making hummus at home is simple and allows you to control the ingredients. You can customize it with your favorite spices or add-ins, like roasted garlic or herbs. Pair it with a variety of veggies, and you have a snack that’s both nutritious and fun to eat. Plus, it’s perfect for sharing at gatherings or enjoying solo!
Ingredients
- 1 can (15 oz) chickpeas, drained and rinsed
- 1/4 cup tahini
- 2 tablespoons olive oil
- 2 tablespoons lemon juice
- 1 garlic clove, minced
- 1/2 teaspoon ground cumin
- Salt and pepper to taste
- Water as needed for consistency
- Assorted fresh vegetables (carrots, cucumbers, bell peppers, celery)
- Pita chips for dipping
Instructions
- Blend the Hummus: In a food processor, combine chickpeas, tahini, olive oil, lemon juice, garlic, cumin, salt, and pepper. Blend until smooth.
- Adjust Consistency: If the hummus is too thick, add water a tablespoon at a time until you reach your desired consistency.
- Prepare the Veggies: While the hummus is blending, wash and cut your vegetables into sticks or bite-sized pieces.
- Serve: Transfer the hummus to a bowl, drizzle with a little olive oil, and sprinkle with paprika if desired. Arrange the veggie dippers and pita chips around the hummus for a beautiful presentation.
Cheesy Cauliflower Bites

Cheesy cauliflower bites are a fantastic snack that packs a protein punch while keeping things light and healthy. These little bites are golden and crispy on the outside, with a soft, cheesy center that makes them irresistible. Perfect for munching between meals, they help satisfy cravings without the guilt.
Making these bites is simple and fun. You can enjoy them on their own or pair them with your favorite dipping sauce. The image shows a plate filled with these delightful bites, garnished with fresh parsley, and served alongside a bowl of marinara sauce. This combo is not only tasty but also adds a pop of color to your snack time.
Whether you're looking for a quick snack or a party appetizer, cheesy cauliflower bites are sure to impress. They are low in carbs and high in flavor, making them a great choice for anyone on a weight loss journey.
Ingredients
- 1 medium head of cauliflower, cut into florets
- 1 cup shredded cheddar cheese
- 1/2 cup grated Parmesan cheese
- 1/2 cup almond flour or breadcrumbs
- 2 large eggs
- 1 teaspoon garlic powder
- 1 teaspoon onion powder
- 1/2 teaspoon salt
- 1/4 teaspoon black pepper
- 1/4 teaspoon paprika (optional)
- Cooking spray or olive oil for greasing
Instructions
- Preheat the Oven: Preheat your oven to 400°F (200°C) and line a baking sheet with parchment paper.
- Prepare the Cauliflower: In a large bowl, combine the cauliflower florets with the eggs, cheddar cheese, Parmesan cheese, almond flour, garlic powder, onion powder, salt, pepper, and paprika. Mix until the cauliflower is well coated.
- Form Bites: Using your hands, form the mixture into small bite-sized balls or patties and place them on the prepared baking sheet.
- Bake: Spray the tops with cooking spray or drizzle with olive oil. Bake in the preheated oven for 20-25 minutes, or until golden brown and crispy.
- Serve: Allow to cool slightly before serving. Enjoy these cheesy bites warm, with your favorite dipping sauce if desired.
Spicy Roasted Edamame
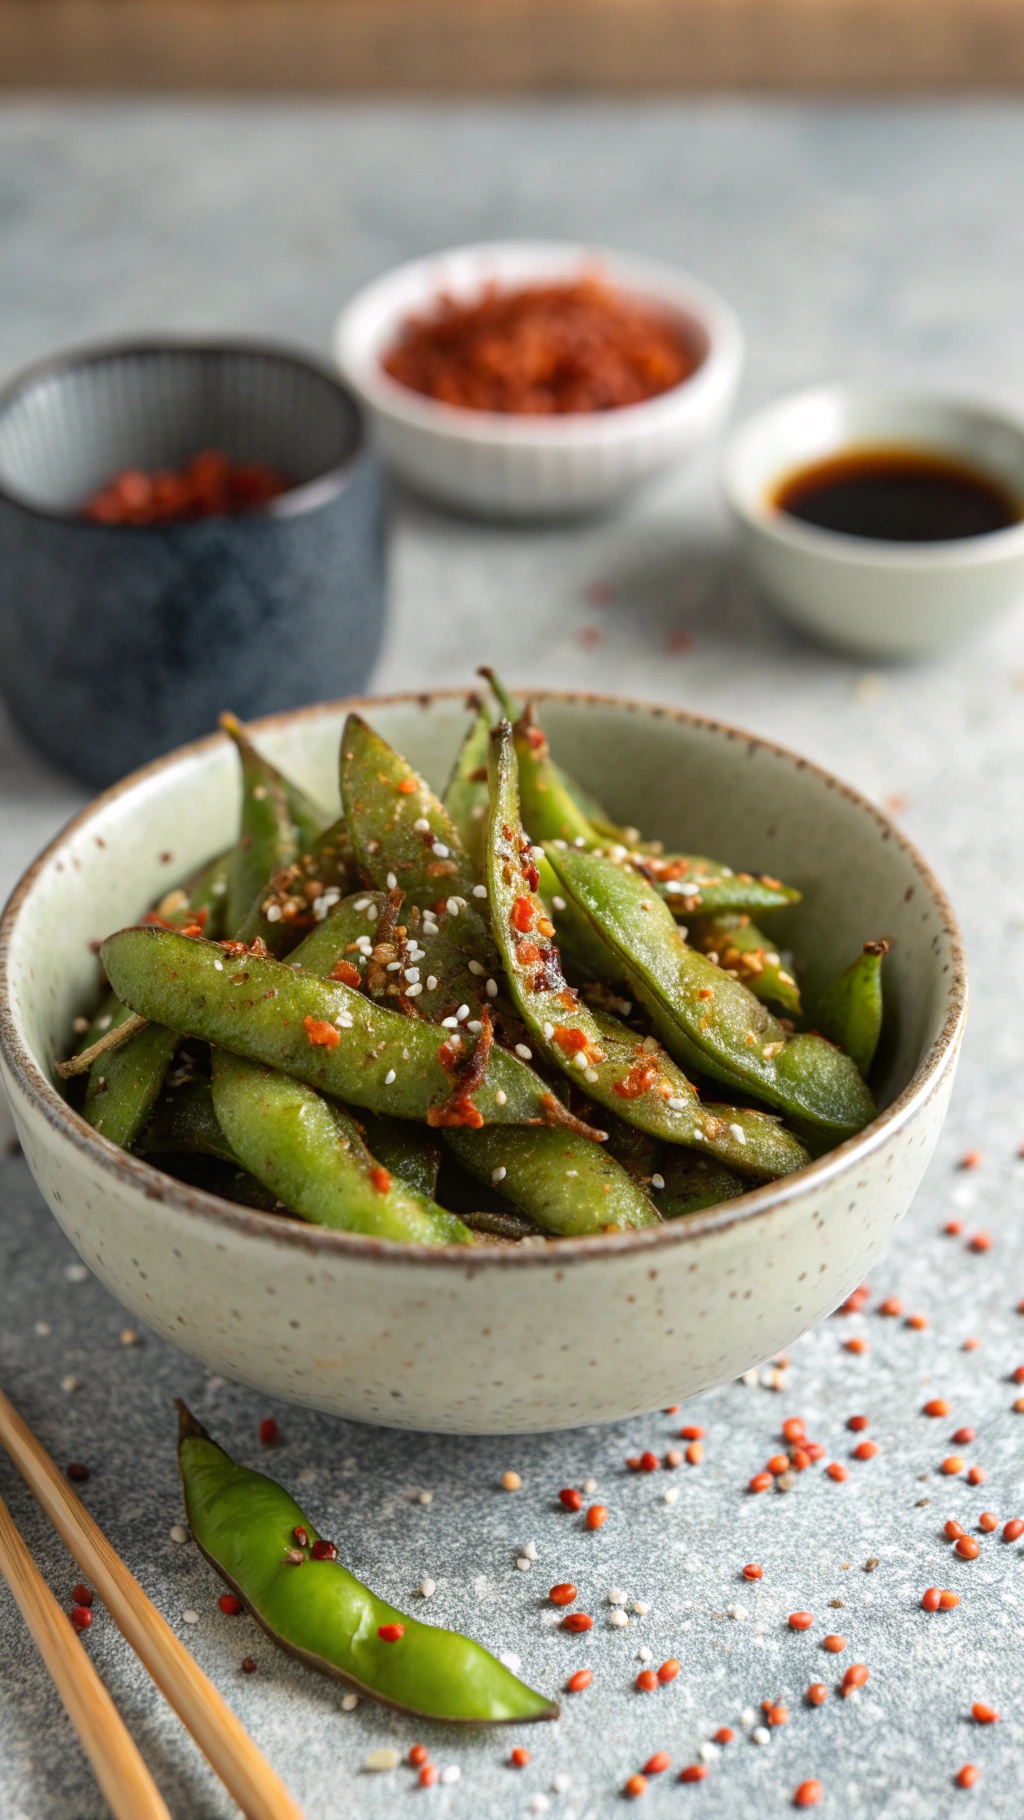
Spicy roasted edamame is a fantastic snack that packs a protein punch while keeping things interesting with a kick of heat. These little green gems are not only delicious but also super easy to make. Perfect for those moments when you crave something crunchy and satisfying!
To prepare, you simply roast the edamame pods until they’re crispy, then toss them with a blend of spices that give them a spicy twist. The result is a snack that’s not just healthy but also full of flavor. You can enjoy them on their own or pair them with your favorite dipping sauce for an extra layer of taste.
Here’s how to make your own spicy roasted edamame at home!
Ingredients
- 2 cups frozen edamame in pods
- 1 tablespoon olive oil
- 1 teaspoon garlic powder
- 1 teaspoon chili powder
- 1/2 teaspoon sea salt
- 1/4 teaspoon black pepper
- 1 tablespoon sesame seeds (optional)
Instructions
- Preheat your oven to 400°F (200°C).
- In a bowl, combine the frozen edamame, olive oil, garlic powder, chili powder, sea salt, and black pepper. Toss until the edamame is well coated.
- Spread the edamame evenly on a baking sheet lined with parchment paper.
- Roast in the oven for about 20-25 minutes, stirring halfway through, until they are crispy and slightly browned.
- If using, sprinkle sesame seeds over the edamame in the last 5 minutes of roasting.
- Remove from the oven and let them cool slightly before serving. Enjoy your spicy roasted edamame as a healthy snack!
Zesty Turkey Jerky
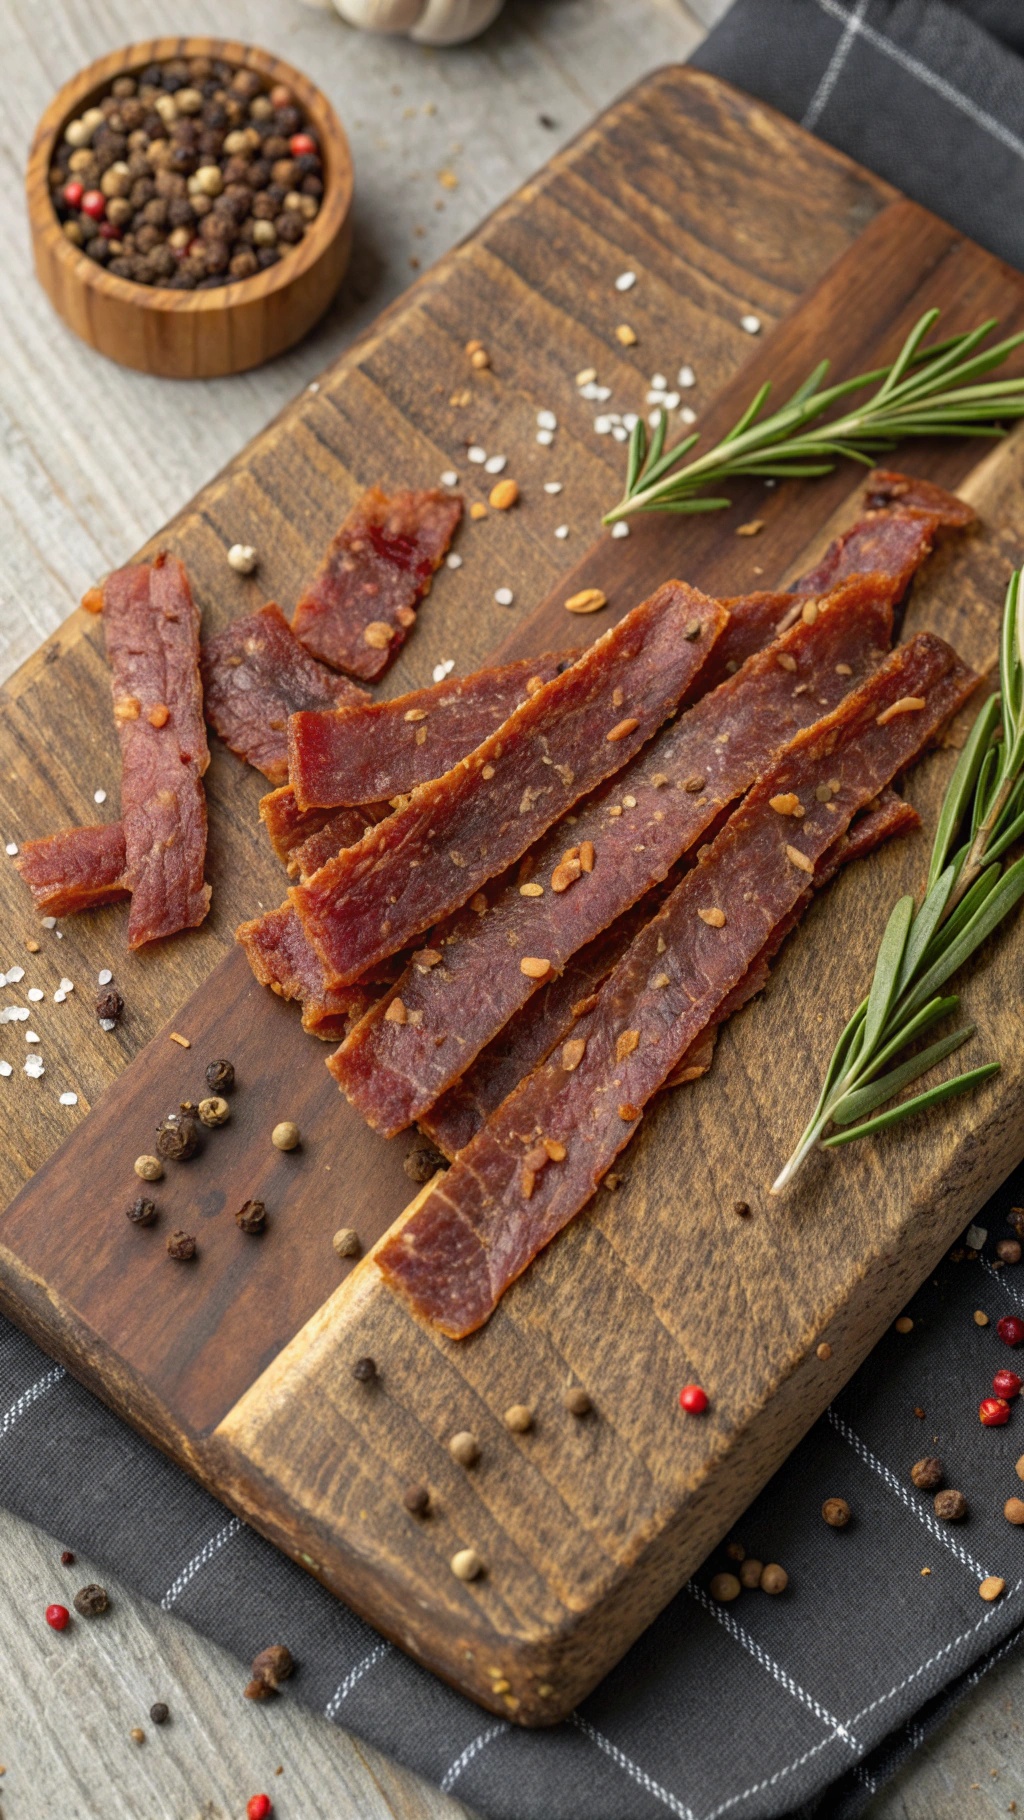
Turkey jerky is a fantastic snack for those looking to lose weight while still enjoying something tasty. It's high in protein and low in fat, making it a perfect choice for satisfying hunger without the extra calories. The image shows strips of turkey jerky laid out on a wooden board, surrounded by spices and fresh herbs. This visual highlights the natural ingredients that go into making a zesty jerky.
The zesty flavor comes from a blend of spices that can include garlic, onion, and a hint of pepper. These ingredients not only enhance the taste but also add nutritional value. When you choose turkey jerky, you’re opting for a snack that keeps you full and energized.
Making your own turkey jerky at home is simple and allows you to control the ingredients. You can customize the spices to suit your taste, ensuring that every bite is just right for you. Plus, it’s a fun way to experiment in the kitchen!
Ingredients
- 1 pound ground turkey
- 2 tablespoons soy sauce
- 1 tablespoon Worcestershire sauce
- 1 teaspoon garlic powder
- 1 teaspoon onion powder
- 1 teaspoon smoked paprika
- 1/2 teaspoon black pepper
- 1/2 teaspoon red pepper flakes (optional)
- 1 tablespoon honey (optional)
Instructions
- Prepare the Marinade: In a bowl, mix together soy sauce, Worcestershire sauce, garlic powder, onion powder, smoked paprika, black pepper, and red pepper flakes. If you like a touch of sweetness, add honey.
- Mix the Turkey: Add the ground turkey to the marinade and mix well until fully combined. Cover and let it marinate in the refrigerator for at least 2 hours, or overnight for more flavor.
- Shape the Jerky: Preheat your oven to 160°F (70°C). Line a baking sheet with parchment paper. Using a piping bag or a plastic bag with the corner cut off, pipe the turkey mixture into thin strips on the parchment paper.
- Dry the Jerky: Place the baking sheet in the oven and let the jerky dry for about 4-6 hours. Check periodically until the jerky is firm and dry but still slightly pliable.
- Cool and Store: Once done, let the jerky cool completely before storing it in an airtight container. Enjoy your homemade zesty turkey jerky as a healthy snack!
Homemade Protein Bars
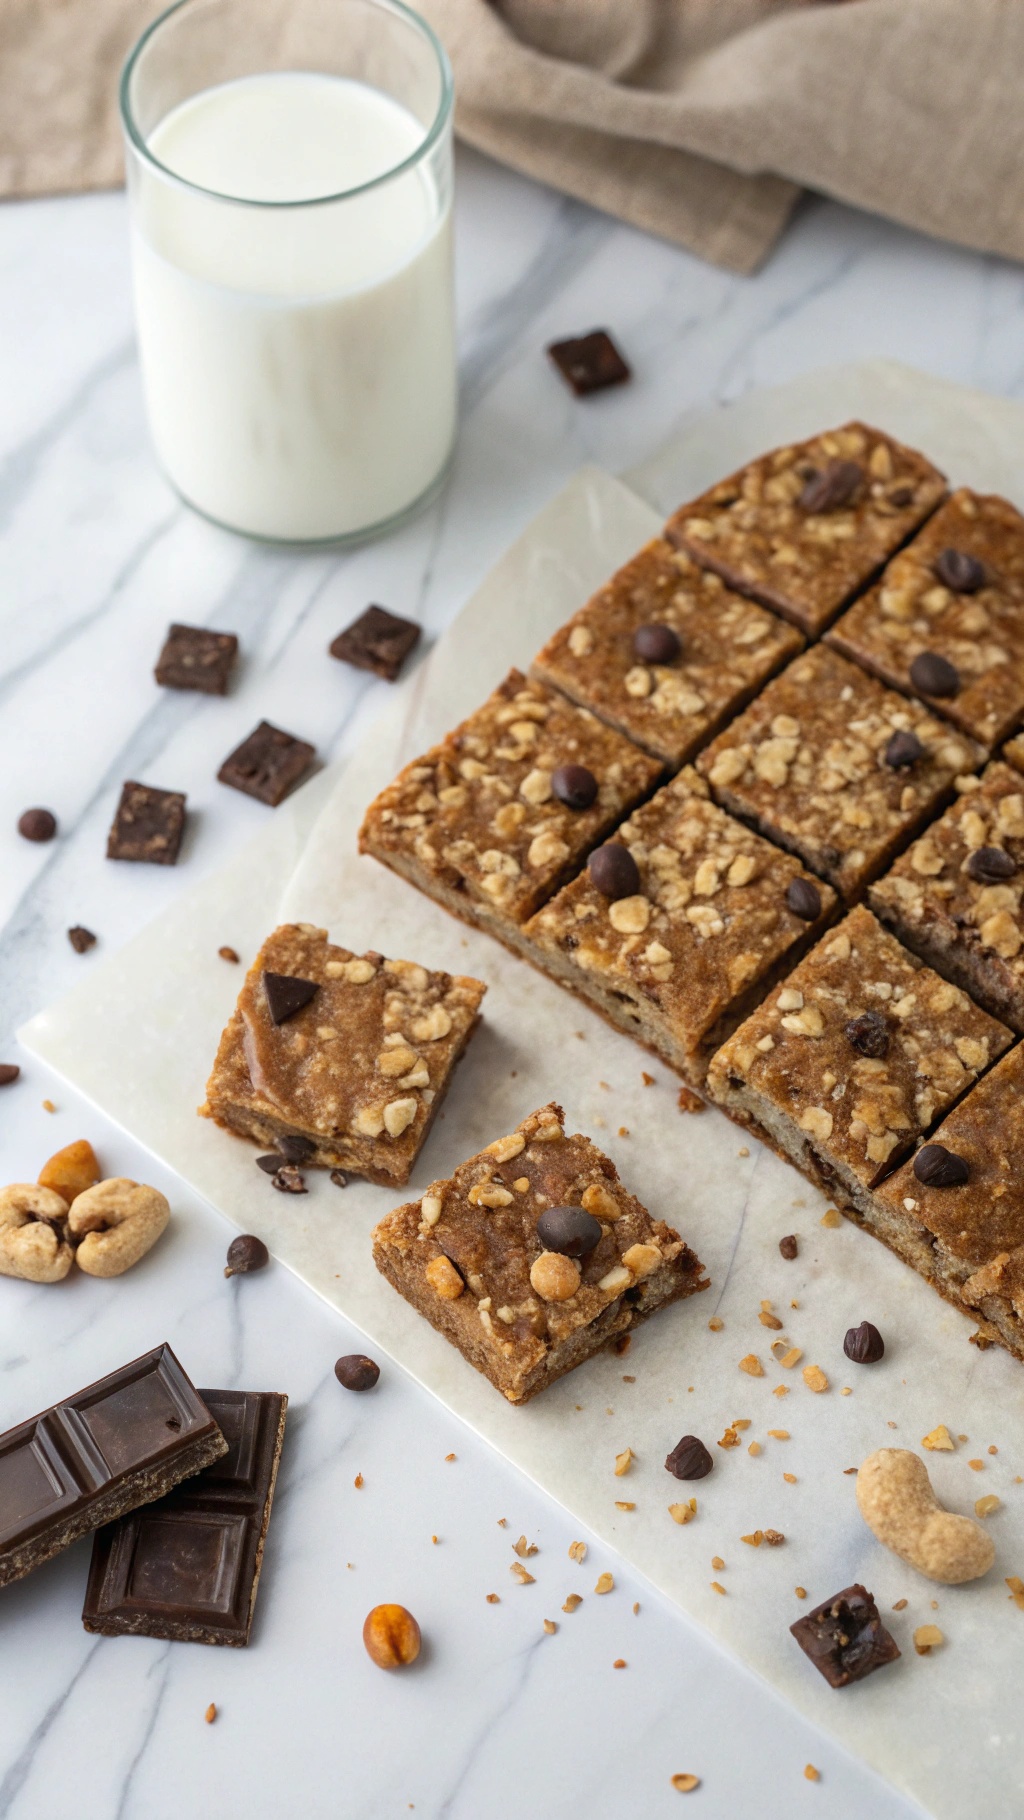
Homemade protein bars are a fantastic way to enjoy a healthy snack that keeps you full and satisfied. They’re easy to make and perfect for anyone looking to lose weight while still enjoying tasty treats. The image shows a delicious batch of protein bars, neatly cut and topped with chocolate chips and nuts. Pairing these bars with a glass of milk makes for a delightful snack.
Making your own protein bars means you can control the ingredients. You can choose your favorite nuts, seeds, and sweeteners. This way, you avoid the added sugars and preservatives often found in store-bought options. Plus, they’re great for meal prep!
Let’s get into a simple recipe that you can whip up in no time. Gather your ingredients and get ready to enjoy a healthy snack that’s packed with protein.
Ingredients
- 1 cup rolled oats
- 1/2 cup nut butter (like almond or peanut butter)
- 1/4 cup honey or maple syrup
- 1/2 cup protein powder (vanilla or chocolate)
- 1/4 cup dark chocolate chips
- 1/4 cup chopped nuts (like almonds or walnuts)
- 1/2 teaspoon vanilla extract
Instructions
- Mix Ingredients: In a large bowl, combine rolled oats, nut butter, honey, protein powder, and vanilla extract. Stir until well mixed.
- Add Mix-ins: Fold in the chocolate chips and chopped nuts until evenly distributed.
- Prepare the Pan: Line an 8x8 inch baking dish with parchment paper. Press the mixture firmly into the dish, spreading it evenly.
- Chill: Place the dish in the refrigerator for at least 1 hour to set.
- Cut and Serve: Once set, remove from the dish and cut into bars. Store in an airtight container in the fridge for up to a week.
Crunchy Roasted Chickpeas

Crunchy roasted chickpeas are a fantastic snack that packs a protein punch. They are not only delicious but also easy to make. Imagine a bowl filled with golden, crispy chickpeas, seasoned to perfection. These little bites are perfect for munching on during movie nights or as a quick pick-me-up during the day.
To make these tasty snacks, you start with canned chickpeas. After rinsing and drying them, toss them in olive oil and your favorite spices. Popular choices include paprika, garlic powder, and a pinch of salt. Then, roast them in the oven until they are crispy. The result is a crunchy, satisfying snack that is both healthy and filling.
These roasted chickpeas are not just for snacking. They can also be added to salads or grain bowls for an extra crunch. They are versatile and can be seasoned in many ways, making them a go-to snack for any occasion.
Ingredients
- 1 can (15 oz) chickpeas, drained and rinsed
- 1 tablespoon olive oil
- 1 teaspoon paprika
- 1/2 teaspoon garlic powder
- 1/2 teaspoon salt
- 1/4 teaspoon black pepper
Instructions
- Preheat your oven to 400°F (200°C).
- Spread the rinsed chickpeas on a clean kitchen towel and pat them dry.
- In a bowl, combine the chickpeas with olive oil, paprika, garlic powder, salt, and black pepper. Toss until evenly coated.
- Spread the chickpeas in a single layer on a baking sheet.
- Roast in the oven for 25-30 minutes, shaking the pan halfway through, until they are golden and crispy.
- Let them cool slightly before enjoying. Store any leftovers in an airtight container.
Satisfying Almond Butter Rice Cakes
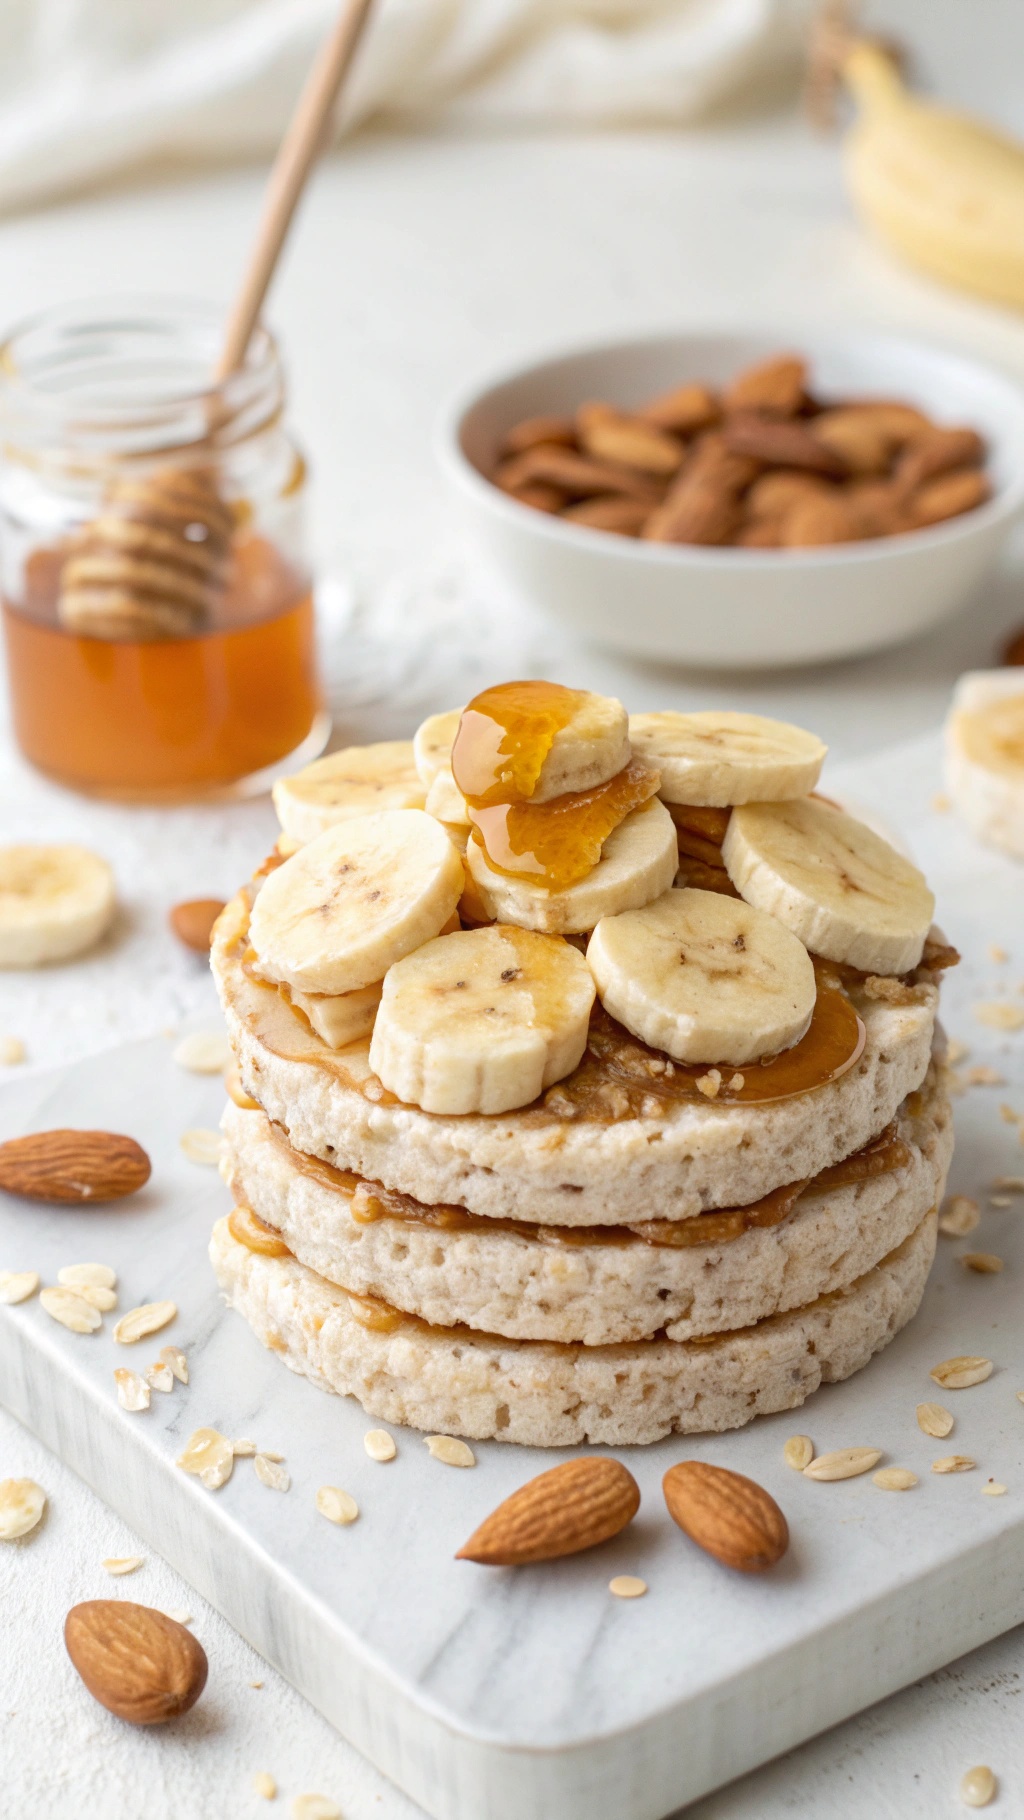
Rice cakes topped with almond butter, banana slices, and a drizzle of honey make a perfect snack. They are light yet filling, providing a great balance of protein and healthy carbs. The crunch of the rice cakes pairs wonderfully with the creaminess of the almond butter.
This snack is not only delicious but also quick to prepare. You can enjoy it at any time of the day, whether as a breakfast option or a midday treat. The sweetness of bananas and honey adds a delightful touch, making it feel indulgent without the guilt.
Plus, rice cakes are low in calories, making them an excellent choice for weight loss. Almond butter is packed with protein and healthy fats, helping you feel satisfied longer. This combination keeps your energy levels up without weighing you down.
Ingredients
- 3 rice cakes
- 1/4 cup almond butter
- 1 banana, sliced
- 1 tablespoon honey
- Handful of almonds (optional)
Instructions
- Spread almond butter evenly over each rice cake.
- Top with banana slices, arranging them nicely.
- Drizzle honey over the bananas for added sweetness.
- Sprinkle almonds on top if you like a bit of crunch.
- Enjoy your satisfying snack!
Refreshing Fruit And Nut Trail Mix
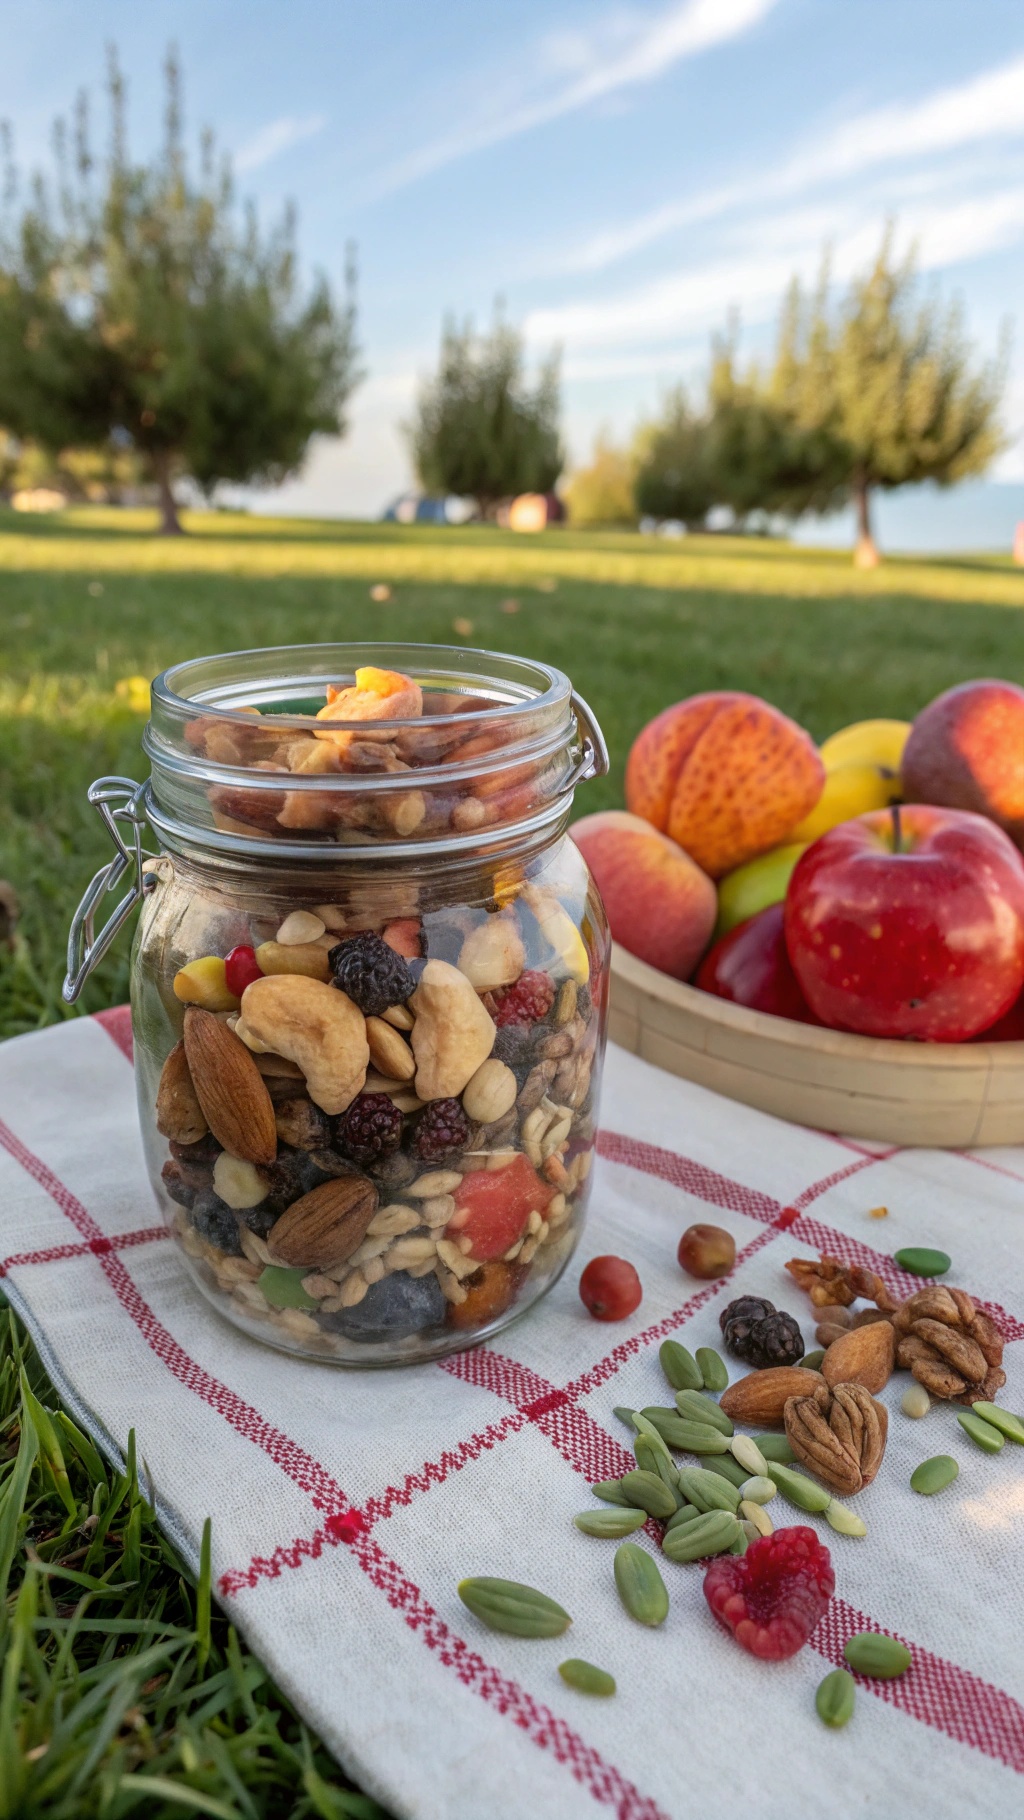
Trail mix is a fantastic snack option, especially when you're looking for something healthy and satisfying. This refreshing fruit and nut trail mix combines the crunch of nuts with the sweetness of dried fruits, making it a perfect choice for weight loss. It's easy to prepare and can be customized to suit your taste.
The image shows a beautiful jar filled with a colorful mix of nuts and dried fruits, set against a serene outdoor backdrop. This visual captures the essence of a healthy lifestyle, inviting you to grab a handful and enjoy nature. The vibrant colors of the fruits and the rustic charm of the setting make this snack look appealing and delicious.
Making your own trail mix allows you to control the ingredients, ensuring you get a healthy dose of protein and fiber. Nuts like almonds, walnuts, and pecans provide healthy fats, while dried fruits like cranberries and apricots add natural sweetness. This mix is not only nutritious but also very portable, making it a great option for on-the-go snacking.
Here’s a simple recipe to create your own refreshing fruit and nut trail mix:
Ingredients
- 1 cup almonds
- 1 cup walnuts
- 1 cup dried cranberries
- 1 cup dried apricots, chopped
- 1/2 cup pumpkin seeds
- 1/2 cup sunflower seeds
- 1/2 cup dark chocolate chips (optional)
Instructions
- In a large bowl, combine all the ingredients. Mix well to ensure an even distribution of nuts and fruits.
- Transfer the mixture to an airtight container or jar for easy storage.
- Enjoy your trail mix as a snack, or pack it for a hike or picnic!
Comments
Post a Comment