- Get link
- X
- Other Apps
15 Budget-Friendly Thanksgiving Desserts That Will Wow Your Guests
Thanksgiving desserts don't have to be expensive to impress your guests. This collection of 15 budget-friendly treats is designed to elevate your holiday feast without draining your wallet. Each recipe is approachable and delicious, ensuring you can bring delightful sweets to the table that everyone will love.
Mouthwatering Apple Crisp With A Crunchy Topping

Apple crisp is a classic dessert that brings warmth and comfort to any Thanksgiving table. The image showcases a beautifully baked apple crisp, topped with a generous scoop of vanilla ice cream. The golden-brown topping is crunchy, promising a delightful texture that pairs perfectly with the tender, sweet apples underneath.
Using fresh apples, this dessert is not only budget-friendly but also easy to prepare. The combination of cinnamon and sugar enhances the natural sweetness of the apples, creating a mouthwatering aroma that fills the kitchen. This dish is sure to impress your guests without straining your wallet.
Gather your ingredients and get ready to whip up this delicious apple crisp!
Ingredients
- 6 cups peeled and sliced apples (such as Granny Smith or Honeycrisp)
- 1 tablespoon lemon juice
- 1/2 cup granulated sugar
- 1 teaspoon ground cinnamon
- 1 cup rolled oats
- 1 cup all-purpose flour
- 1/2 cup packed brown sugar
- 1/2 cup unsalted butter, melted
- 1/4 teaspoon salt
Instructions
- Preheat your oven to 350°F (175°C).
- In a large bowl, toss the sliced apples with lemon juice, granulated sugar, and cinnamon. Spread the mixture evenly in a greased baking dish.
- In another bowl, combine rolled oats, flour, brown sugar, melted butter, and salt. Mix until crumbly.
- Sprinkle the oat mixture over the apples, covering them evenly.
- Bake for 30-35 minutes, or until the topping is golden brown and the apples are bubbly.
- Let it cool slightly before serving. Top with a scoop of vanilla ice cream for an extra treat!
Decadent Chocolate Pudding Cups For A Sweet Finish
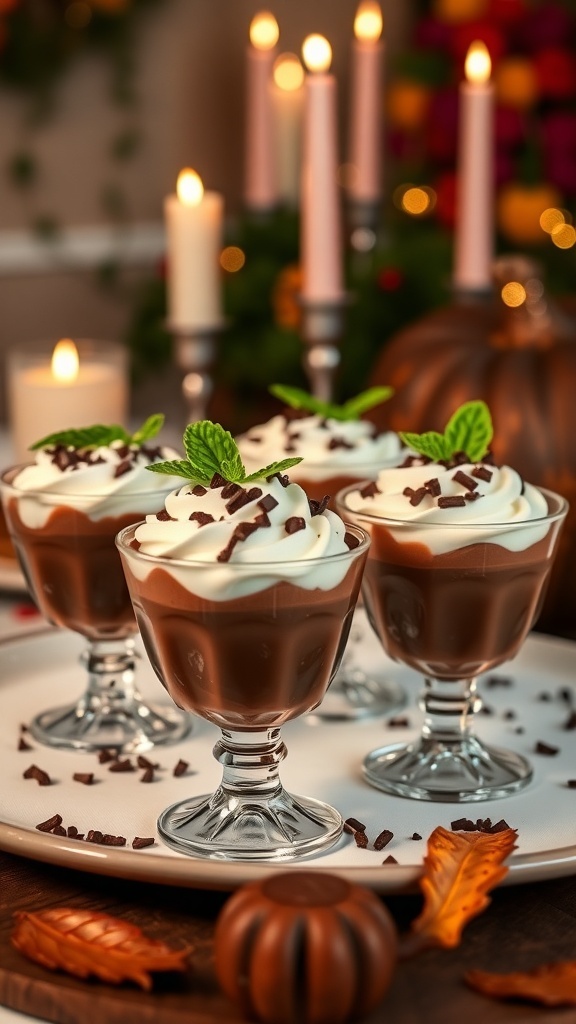
Chocolate pudding cups are a delightful way to wrap up your Thanksgiving feast. These treats are simple to make and look stunning on the table. Imagine small cups filled with rich chocolate pudding, topped with fluffy whipped cream and a sprinkle of chocolate shavings. They not only taste amazing but also add a touch of elegance to your dessert spread.
These pudding cups are budget-friendly, using common ingredients that won’t break the bank. You can whip them up in no time, leaving you with more moments to enjoy with family and friends. Plus, they can be made ahead of time, making your holiday prep a breeze.
To make these chocolate pudding cups, you’ll need some basic ingredients like cocoa powder, sugar, milk, and cornstarch. The steps are straightforward, ensuring that even novice bakers can create this sweet finish to their Thanksgiving meal.
Ingredients
- 1/2 cup granulated sugar
- 1/3 cup unsweetened cocoa powder
- 1/4 cup cornstarch
- 1/8 teaspoon salt
- 2 3/4 cups milk
- 2 tablespoons unsalted butter
- 1 teaspoon vanilla extract
- Whipped cream for topping
- Chocolate shavings for garnish
Instructions
- In a medium saucepan, whisk together sugar, cocoa powder, cornstarch, and salt.
- Gradually stir in milk, ensuring there are no lumps.
- Cook over medium heat, stirring constantly until the mixture thickens and begins to boil.
- Remove from heat and stir in butter and vanilla extract until smooth.
- Pour the pudding into individual cups and let them cool. Refrigerate for at least 2 hours.
- Before serving, top with whipped cream and sprinkle chocolate shavings on top.
Simple No-Bake Cheesecake That Impresses Guests
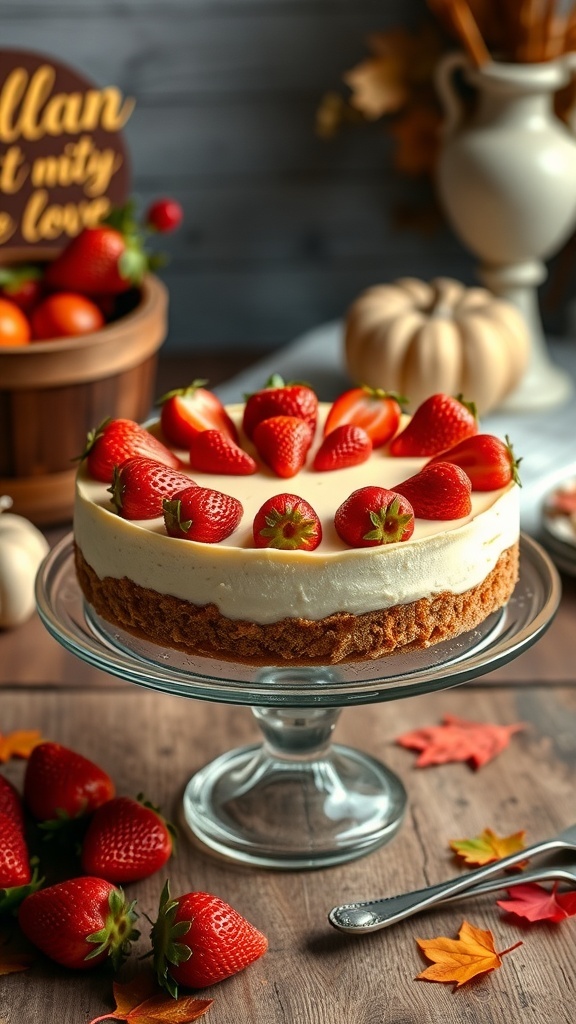
This no-bake cheesecake is a showstopper. It looks stunning with its creamy texture and fresh strawberries on top. Perfect for Thanksgiving, it’s simple to make and won’t stress your budget.
The base is made from crushed graham crackers, mixed with melted butter for that delightful crunch. The filling is a blend of cream cheese, sugar, and whipped cream, creating a smooth and rich taste. Topping it off with strawberries adds a pop of color and freshness.
Not only does this dessert impress guests, but it also saves time in the kitchen. You can prepare it ahead of time and let it chill in the fridge. When it’s time to serve, just slice and enjoy!
Ingredients
- 1 ½ cups graham cracker crumbs
- ½ cup unsalted butter, melted
- 2 cups cream cheese, softened
- 1 cup powdered sugar
- 1 teaspoon vanilla extract
- 1 cup heavy whipping cream
- Fresh strawberries for topping
Instructions
- Make the Crust: In a bowl, combine graham cracker crumbs and melted butter. Press the mixture into the bottom of a 9-inch springform pan to form an even layer.
- Prepare the Filling: In another bowl, beat the softened cream cheese until smooth. Gradually add powdered sugar and vanilla extract, mixing until well combined.
- Whip the Cream: In a separate bowl, whip the heavy cream until stiff peaks form. Gently fold the whipped cream into the cream cheese mixture until fully incorporated.
- Assemble the Cheesecake: Pour the filling over the crust in the springform pan. Smooth the top with a spatula. Cover and refrigerate for at least 4 hours, or overnight for best results.
- Serve: Once set, remove the cheesecake from the pan. Top with fresh strawberries before slicing and serving.
Lemon Meringue Pie For A Zesty Surprise
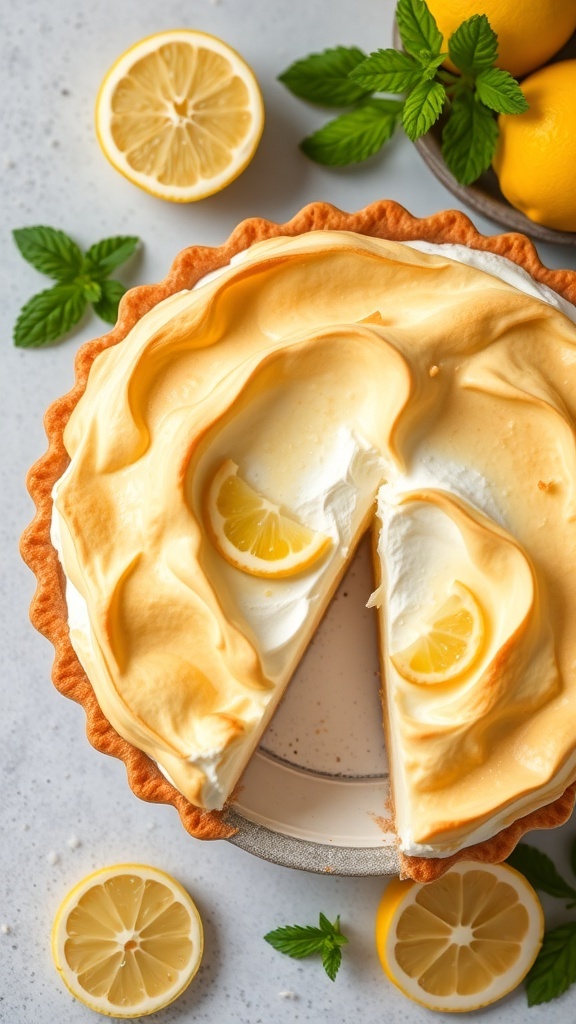
Lemon meringue pie is a classic dessert that brings a refreshing twist to any Thanksgiving table. Its bright, zesty flavor cuts through the richness of traditional holiday dishes, making it a delightful choice. The combination of tangy lemon filling and fluffy meringue creates a perfect balance that will impress your guests.
The image showcases a beautifully baked lemon meringue pie, with its golden meringue topping swirled to perfection. Slices of fresh lemon and sprigs of mint add a pop of color, making it not just tasty but visually appealing too. This pie is sure to be a hit, and the best part is, it won’t break the bank!
Ingredients
- 1 pre-made pie crust
- 1 cup granulated sugar
- 2 tablespoons cornstarch
- 1/4 teaspoon salt
- 1 cup water
- 3 large egg yolks, beaten
- 1/2 cup fresh lemon juice
- 2 tablespoons unsalted butter
- 1 teaspoon lemon zest
- 3 large egg whites
- 1/4 teaspoon cream of tartar
- 1/2 cup granulated sugar (for meringue)
Instructions
- Preheat your oven to 350°F (175°C). Place the pie crust in a pie dish and bake according to package instructions until golden. Let it cool.
- In a saucepan, mix 1 cup sugar, cornstarch, and salt. Gradually stir in water and cook over medium heat until thickened, stirring constantly.
- Once thick, remove from heat. Stir a small amount of the hot mixture into the beaten egg yolks, then return it all to the saucepan. Stir in lemon juice, butter, and lemon zest. Cook for another 2 minutes, then pour into the baked pie crust.
- For the meringue, beat egg whites with cream of tartar until soft peaks form. Gradually add 1/2 cup sugar, beating until stiff peaks form.
- Spread the meringue over the lemon filling, making sure to seal the edges. Bake for 10-15 minutes until the meringue is golden brown.
- Let the pie cool before serving. Enjoy your zesty surprise!
Rich And Creamy Bread Pudding With Raisins
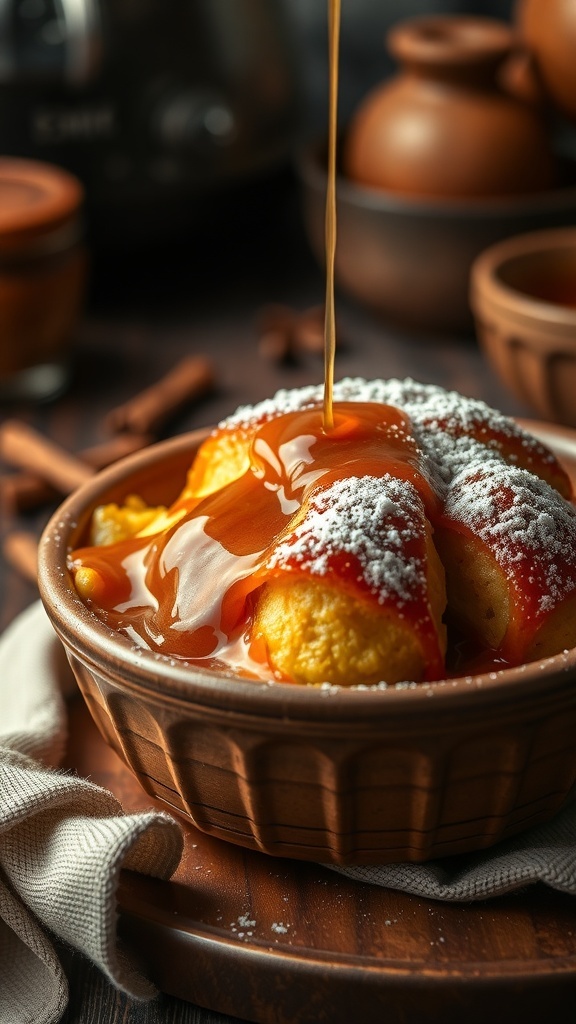
When it comes to Thanksgiving desserts, bread pudding is a classic that never disappoints. This rich and creamy dish is perfect for the holiday season. Imagine warm, fluffy bread soaked in a sweet custard, dotted with plump raisins, and drizzled with caramel sauce. It’s comfort food at its finest!
The beauty of bread pudding lies in its simplicity. You can use leftover bread, making it a budget-friendly option. Plus, it’s easy to prepare, allowing you to spend more time with family and friends. The combination of textures and flavors will surely impress your guests.
To make this delightful dessert, gather your ingredients and follow the steps below. You’ll have a warm, comforting treat that’s perfect for the Thanksgiving table.
Ingredients
- 6 cups day-old bread, cubed
- 2 cups milk
- 1 cup heavy cream
- 3/4 cup granulated sugar
- 4 large eggs
- 1 teaspoon vanilla extract
- 1 teaspoon ground cinnamon
- 1/2 teaspoon salt
- 1 cup raisins
- Caramel sauce for drizzling
Instructions
- Preheat your oven to 350°F (175°C).
- In a large bowl, combine the milk, heavy cream, sugar, eggs, vanilla, cinnamon, and salt. Whisk until smooth.
- Add the cubed bread and raisins to the mixture. Stir gently to coat the bread evenly.
- Pour the mixture into a greased baking dish. Let it sit for about 10 minutes to allow the bread to soak up the custard.
- Bake for 45-50 minutes, or until the top is golden brown and the custard is set.
- Remove from the oven and let it cool slightly. Drizzle with caramel sauce before serving.
Delicious Cranberry Orange Muffins For A Festive Touch
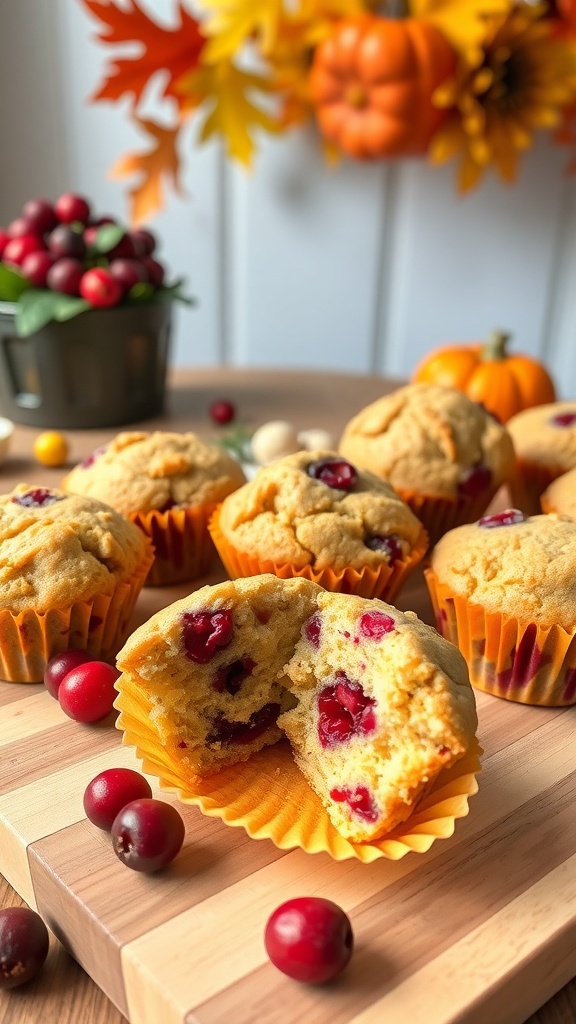
Cranberry orange muffins bring a delightful twist to your Thanksgiving dessert table. The vibrant red of the cranberries against the warm orange hue of the muffins creates a festive look that’s perfect for the season. These muffins are not only visually appealing but also bursting with flavor, making them a great addition to your holiday spread.
With the tartness of cranberries and the zesty brightness of orange, each bite is a little celebration. They are easy to make and budget-friendly, allowing you to impress your guests without overspending. Plus, they can be enjoyed as a sweet treat or a breakfast option during the holiday weekend.
Let’s get into the recipe so you can whip up a batch of these delightful muffins!
Ingredients
- 1 ½ cups all-purpose flour
- ½ cup granulated sugar
- 2 teaspoons baking powder
- ½ teaspoon baking soda
- ¼ teaspoon salt
- 1 large egg
- ½ cup milk
- ¼ cup vegetable oil
- 1 tablespoon orange zest
- 1 cup fresh or frozen cranberries, chopped
Instructions
- Preheat your oven to 375°F (190°C) and line a muffin tin with paper liners.
- In a large bowl, whisk together the flour, sugar, baking powder, baking soda, and salt.
- In another bowl, beat the egg and then mix in the milk, vegetable oil, and orange zest.
- Pour the wet ingredients into the dry ingredients and stir until just combined. Be careful not to overmix.
- Gently fold in the chopped cranberries.
- Scoop the batter into the prepared muffin tin, filling each cup about two-thirds full.
- Bake for 18-20 minutes or until a toothpick inserted into the center comes out clean.
- Let the muffins cool in the pan for a few minutes before transferring them to a wire rack to cool completely.
Classic Pecan Pie That Everyone Will Love
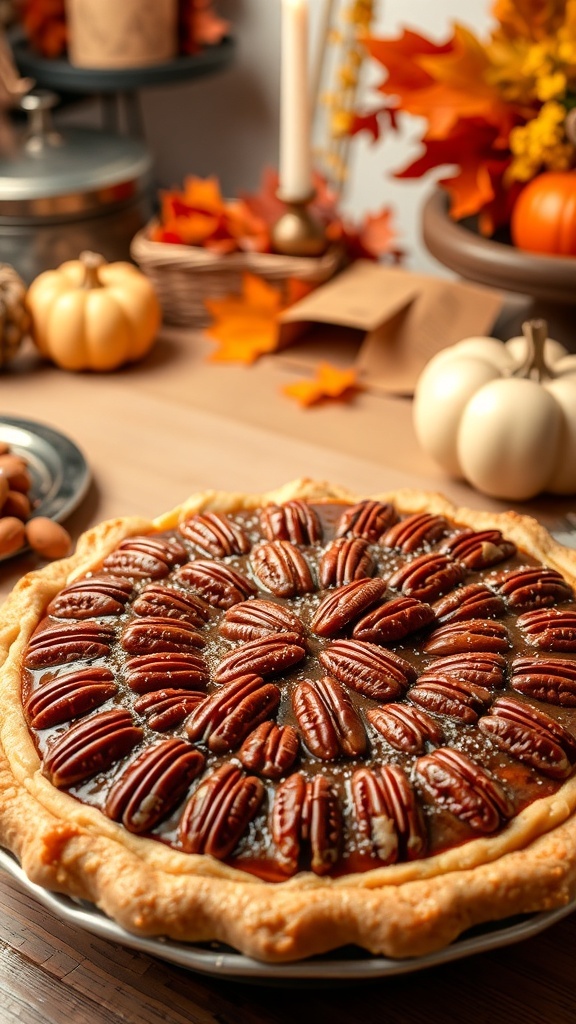
Pecan pie is a timeless dessert that brings warmth and sweetness to any Thanksgiving table. Its rich, gooey filling and crunchy pecans create a delightful contrast that everyone enjoys. This pie is not only delicious but also budget-friendly, making it a perfect choice for your holiday feast.
The image showcases a beautifully baked pecan pie, with its glossy filling and perfectly arranged pecans on top. The warm autumn colors in the background, along with seasonal decorations, set a cozy mood for the holiday. This pie is sure to impress your guests without straining your wallet.
Making pecan pie is simple and requires just a few ingredients. You can easily whip it up and have it ready to serve after your Thanksgiving meal. Let’s dive into the recipe!
Ingredients
- 1 unbaked pie crust
- 1 cup corn syrup
- 1 cup granulated sugar
- 1/2 cup unsalted butter, melted
- 4 large eggs
- 1 teaspoon vanilla extract
- 1/4 teaspoon salt
- 1 1/2 cups pecan halves
Instructions
- Preheat your oven to 350°F (175°C).
- In a large bowl, whisk together the corn syrup, sugar, melted butter, eggs, vanilla extract, and salt until well combined.
- Stir in the pecan halves, ensuring they are evenly distributed in the mixture.
- Pour the filling into the unbaked pie crust, spreading it evenly.
- Bake for 60-70 minutes, or until the filling is set and the top is golden brown. You can check for doneness by gently shaking the pie; it should not jiggle excessively.
- Allow the pie to cool before slicing. Serve it warm or at room temperature, and enjoy!
Homemade Chocolate Chip Cookies To Satisfy Sweet Cravings
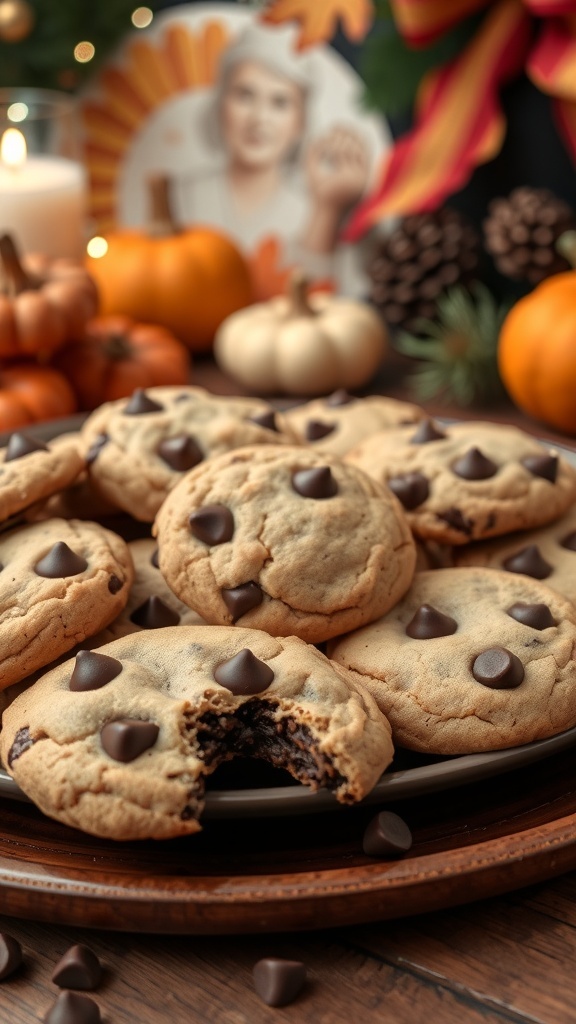
Chocolate chip cookies are a classic treat that brings joy to any gathering, especially during Thanksgiving. These cookies are soft, chewy, and loaded with chocolate chips, making them a favorite for both kids and adults. The warm, buttery aroma fills the kitchen, creating a cozy atmosphere perfect for the holiday season.
In the image, you can see a delicious plate of freshly baked chocolate chip cookies. They are golden brown with melty chocolate chips on top, inviting you to take a bite. The background features festive decorations like pumpkins and pinecones, adding to the Thanksgiving spirit.
Making these cookies is simple and budget-friendly. You don’t need fancy ingredients to whip up a batch that will impress your guests. Just gather some basic pantry staples, and you’re good to go!
Ingredients
- 1 cup unsalted butter, softened
- 3/4 cup granulated sugar
- 3/4 cup brown sugar, packed
- 1 teaspoon vanilla extract
- 2 large eggs
- 2 1/4 cups all-purpose flour
- 1 teaspoon baking soda
- 1/2 teaspoon salt
- 2 cups chocolate chips
Instructions
- Preheat the oven to 350°F (175°C). Line a baking sheet with parchment paper.
- In a large bowl, cream together the softened butter, granulated sugar, and brown sugar until smooth.
- Add the vanilla extract and eggs, mixing until well combined.
- In another bowl, whisk together the flour, baking soda, and salt. Gradually add this dry mixture to the wet ingredients, stirring until just combined.
- Fold in the chocolate chips, ensuring they are evenly distributed throughout the dough.
- Drop rounded tablespoons of dough onto the prepared baking sheet, spacing them a few inches apart.
- Bake for 10-12 minutes, or until the edges are lightly golden. The centers may look slightly underbaked; they will continue to cook as they cool.
- Let the cookies cool on the baking sheet for a few minutes before transferring them to a wire rack to cool completely.
Delectable Caramel Apple Tart For Fall Flavors
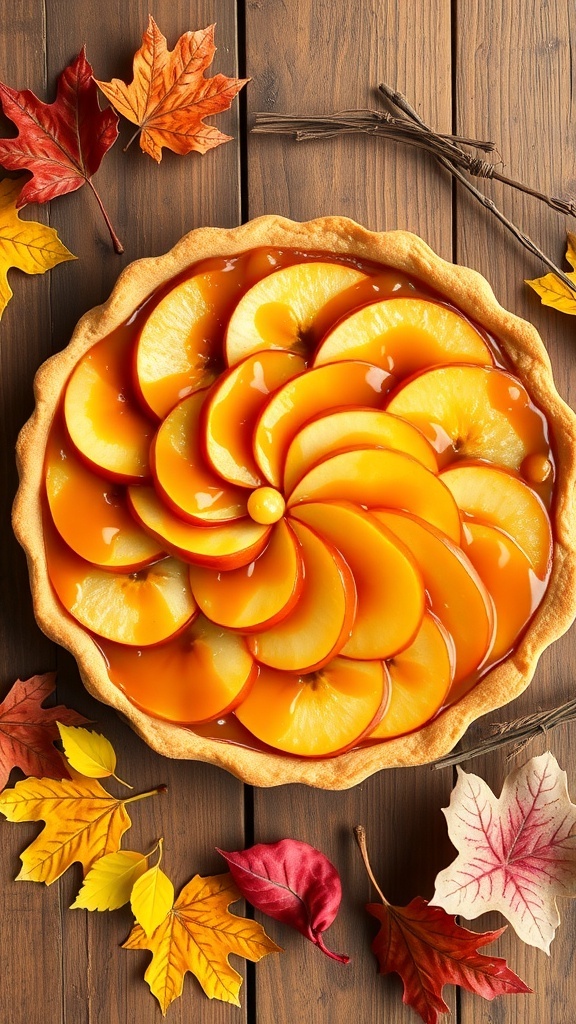
Fall is the perfect time to enjoy a warm, comforting dessert, and a caramel apple tart fits the bill beautifully. This tart combines the sweetness of apples with rich caramel, all nestled in a flaky crust. The vibrant colors of the apples, paired with the golden caramel, create a stunning presentation that will impress your guests.
The image showcases a beautifully arranged tart, with thinly sliced apples fanned out in a circular pattern. The glossy caramel glaze adds a touch of elegance, making it a showstopper for any Thanksgiving table. Surrounding the tart are colorful autumn leaves, enhancing the seasonal vibe.
Making this tart is easier than you might think. With just a few simple ingredients, you can create a dessert that looks and tastes like it came from a bakery. Plus, it’s budget-friendly, making it a great choice for the holiday season.
Ingredients
- 1 pre-made pie crust
- 4 medium apples, peeled and thinly sliced
- 1 cup granulated sugar
- 1/4 cup unsalted butter
- 1/2 cup heavy cream
- 1 teaspoon vanilla extract
- 1 teaspoon ground cinnamon
- 1/4 teaspoon salt
Instructions
- Preheat your oven to 350°F (175°C). Place the pie crust in a tart pan and prick the bottom with a fork.
- Arrange the sliced apples in the crust, overlapping them in a circular pattern.
- In a saucepan, combine sugar and butter over medium heat. Stir until melted and bubbly.
- Slowly add the heavy cream, vanilla, cinnamon, and salt. Stir until smooth and let it simmer for 2-3 minutes.
- Pour the caramel mixture over the apples, ensuring they are well coated.
- Bake for 30-35 minutes, or until the apples are tender and the crust is golden brown.
- Let it cool slightly before serving. Enjoy your delicious caramel apple tart!
Flavorful Gingerbread Cookies For Holiday Cheer

Gingerbread cookies are a classic treat that brings warmth and joy to any holiday gathering. These cookies, with their lovely golden color and festive decorations, are sure to impress your guests. The aroma of spices like ginger and cinnamon fills the air, creating a cozy atmosphere perfect for Thanksgiving.
Making gingerbread cookies is not just about baking; it's about creating memories. Gather your family or friends, roll out the dough, and let everyone decorate their own cookies. This fun activity adds a personal touch to your holiday celebration.
These cookies are budget-friendly and can be made with simple ingredients you likely already have in your pantry. Plus, they look beautiful on a platter, making them a delightful centerpiece for your dessert table.
Ingredients
- 3 cups all-purpose flour
- 1 teaspoon baking soda
- 1 tablespoon ground ginger
- 1 tablespoon ground cinnamon
- 1/2 teaspoon ground cloves
- 1/2 teaspoon salt
- 1 cup unsalted butter, softened
- 1 cup brown sugar, packed
- 1 large egg
- 1/2 cup molasses
- 1 teaspoon vanilla extract
- Decorative icing and sprinkles (for decorating)
Instructions
- Mix Dry Ingredients: In a bowl, whisk together flour, baking soda, ginger, cinnamon, cloves, and salt. Set aside.
- Prepare Dough: In a large bowl, cream together the softened butter and brown sugar until light and fluffy. Beat in the egg, molasses, and vanilla until well combined.
- Combine Mixtures: Gradually add the dry ingredients to the wet mixture, mixing until a dough forms. Wrap the dough in plastic wrap and refrigerate for at least 1 hour.
- Roll and Cut: Preheat your oven to 350°F (175°C). Roll out the chilled dough on a floured surface to about 1/4 inch thick. Use cookie cutters to cut out shapes.
- Bake: Place the cookies on a baking sheet lined with parchment paper. Bake for 8-10 minutes or until the edges are firm. Let them cool completely.
- Decorate: Once cooled, use decorative icing and sprinkles to bring your cookies to life. Get creative with your designs!
Decadent Pumpkin Cheesecake Bars For A Unique Twist
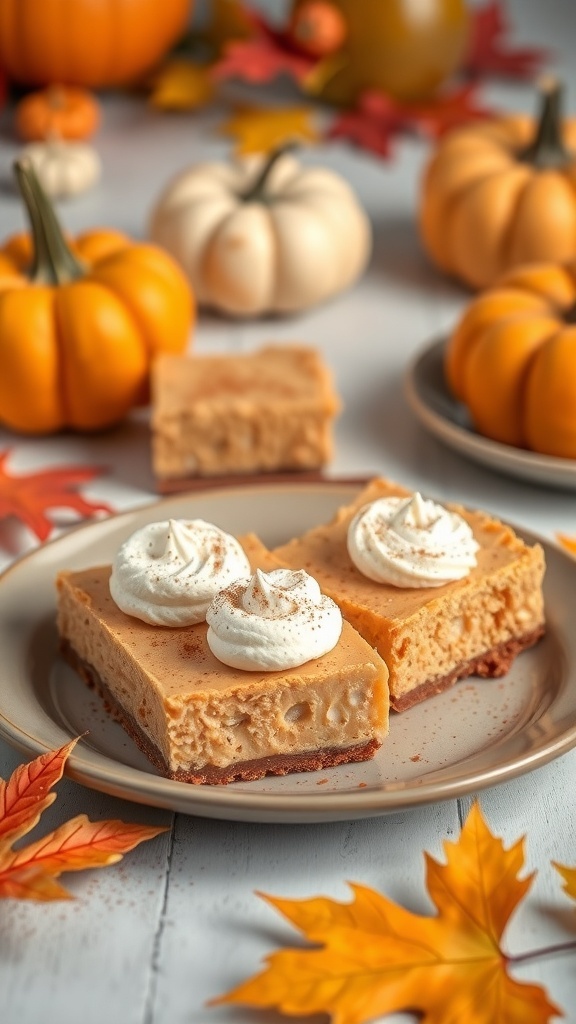
These pumpkin cheesecake bars are a delightful treat for Thanksgiving. They combine the creamy texture of cheesecake with the warm flavors of pumpkin spice, making them a perfect dessert for the season. The bars are beautifully presented, topped with whipped cream and a sprinkle of cinnamon, sitting on a plate surrounded by vibrant autumn leaves and mini pumpkins. This festive display adds a cozy touch to any holiday table.
Making these bars is simple and budget-friendly, ensuring you can impress your guests without overspending. They are easy to cut into squares, making them perfect for serving at gatherings. Everyone will love the unique twist on traditional pumpkin pie!
Ingredients
- 1 1/2 cups graham cracker crumbs
- 1/4 cup granulated sugar
- 1/2 cup unsalted butter, melted
- 2 (8 oz) packages cream cheese, softened
- 1 cup canned pumpkin puree
- 1 cup granulated sugar
- 1 teaspoon vanilla extract
- 3 large eggs
- 1 teaspoon ground cinnamon
- 1/2 teaspoon ground nutmeg
- 1/4 teaspoon ground ginger
- 1/4 teaspoon salt
- Whipped cream for topping
Instructions
- Preheat the oven to 350°F (175°C). Grease a 9x13 inch baking dish.
- In a bowl, mix graham cracker crumbs, sugar, and melted butter until combined. Press the mixture firmly into the bottom of the prepared baking dish to form the crust.
- In a large mixing bowl, beat the cream cheese until smooth. Add pumpkin puree, sugar, and vanilla extract. Mix until well combined.
- Add eggs one at a time, mixing well after each addition. Stir in cinnamon, nutmeg, ginger, and salt until smooth.
- Pour the pumpkin mixture over the crust and spread evenly. Bake for 30-35 minutes, or until the center is set.
- Allow to cool completely, then refrigerate for at least 2 hours before cutting into bars.
- Serve chilled, topped with whipped cream and a sprinkle of cinnamon.
Classic Rice Pudding With A Dash Of Cinnamon
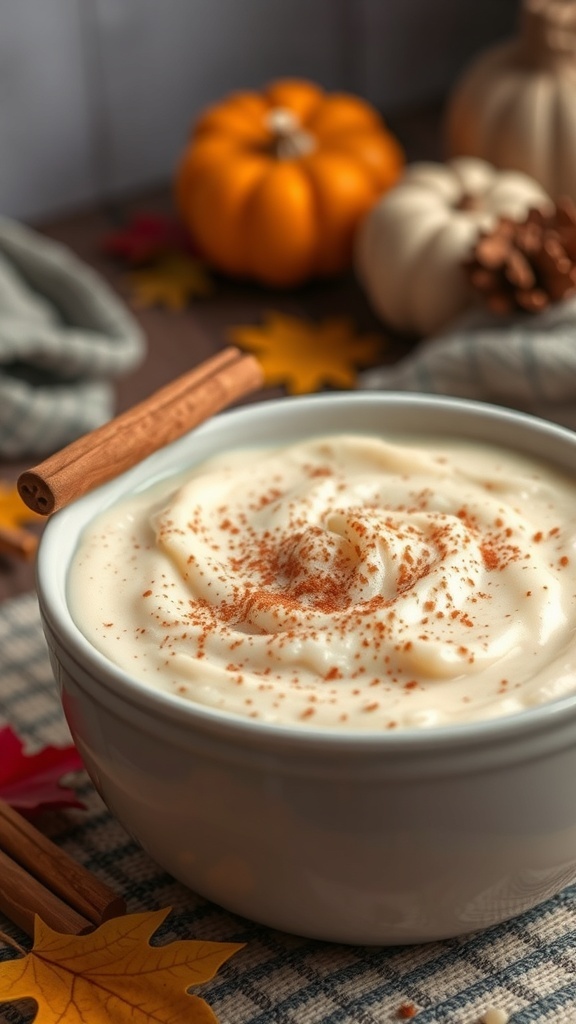
Rice pudding is a timeless dessert that brings warmth and comfort to any Thanksgiving table. This creamy treat is simple to make and uses affordable ingredients, making it a perfect choice for those on a budget. The image showcases a bowl of rice pudding topped with a sprinkle of cinnamon, surrounded by autumn leaves and small pumpkins, setting a cozy fall vibe.
The beauty of rice pudding lies in its versatility. You can enjoy it warm or chilled, and it pairs wonderfully with a dash of cinnamon, which adds a lovely spice that complements the sweetness of the dish. Plus, it’s a great way to use up leftover rice!
Gather your family around and share this delightful dessert. It’s sure to impress your guests without straining your wallet.
Ingredients
- 1 cup uncooked white rice
- 2 cups milk
- 1 cup water
- 1/2 cup granulated sugar
- 1/4 teaspoon salt
- 1 teaspoon vanilla extract
- 1/2 teaspoon ground cinnamon
- 1/4 cup raisins (optional)
- Whipped cream for topping (optional)
Instructions
- Cook the Rice: In a medium saucepan, combine the rice, water, and a pinch of salt. Bring to a boil, then reduce the heat, cover, and simmer for about 20 minutes until the rice is tender and the water is absorbed.
- Add Milk and Sugar: Stir in the milk, sugar, and cinnamon. Cook over medium heat, stirring frequently, until the mixture thickens, about 15-20 minutes.
- Add Vanilla and Raisins: Remove from heat and stir in the vanilla extract and raisins, if using. Let it cool slightly.
- Serve: Spoon the rice pudding into bowls, top with whipped cream if desired, and sprinkle with extra cinnamon before serving.
Charming Mini Pumpkin Pies For Individual Servings
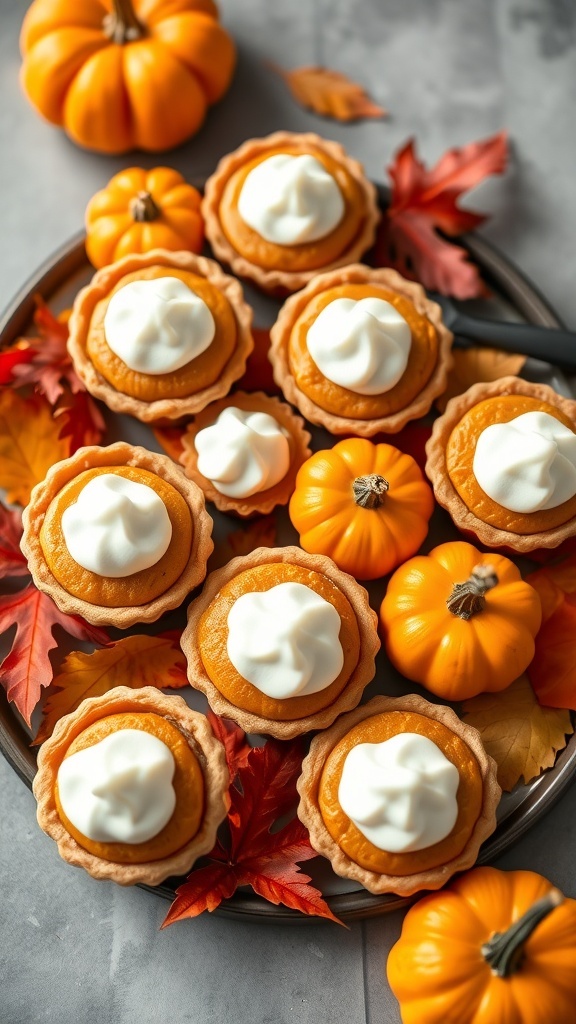
These charming mini pumpkin pies are the perfect dessert for your Thanksgiving gathering. They bring all the classic flavors of pumpkin pie in a cute, individual serving size. The golden crusts are filled with a smooth pumpkin filling, topped with a dollop of whipped cream. They not only look delightful but also make serving easy, allowing guests to enjoy their dessert without needing to slice a larger pie.
Mini pumpkin pies are budget-friendly and require simple ingredients you likely already have in your pantry. Plus, they can be made ahead of time, making your holiday prep a breeze. These little treats are sure to impress your family and friends, adding a touch of charm to your Thanksgiving table.
Ingredients
- 1 package refrigerated pie crusts
- 1 can (15 oz) pumpkin puree
- 3/4 cup sweetened condensed milk
- 1/2 teaspoon ground cinnamon
- 1/4 teaspoon ground nutmeg
- 1/4 teaspoon ground ginger
- 1/4 teaspoon salt
- 2 large eggs
- Whipped cream for topping
Instructions
- Preheat the oven to 425°F (220°C).
- Roll out the pie crusts and cut them into circles to fit a muffin tin. Press each circle into the muffin cups to form mini crusts.
- In a mixing bowl, combine pumpkin puree, sweetened condensed milk, cinnamon, nutmeg, ginger, salt, and eggs. Whisk until smooth.
- Pour the pumpkin filling into each mini crust, filling them about 3/4 full.
- Bake for 15-20 minutes, or until the filling is set and the crust is golden brown.
- Let them cool before topping with whipped cream. Serve and enjoy!
Yummy Berry Crisp With Oat Topping For A Fresh Taste
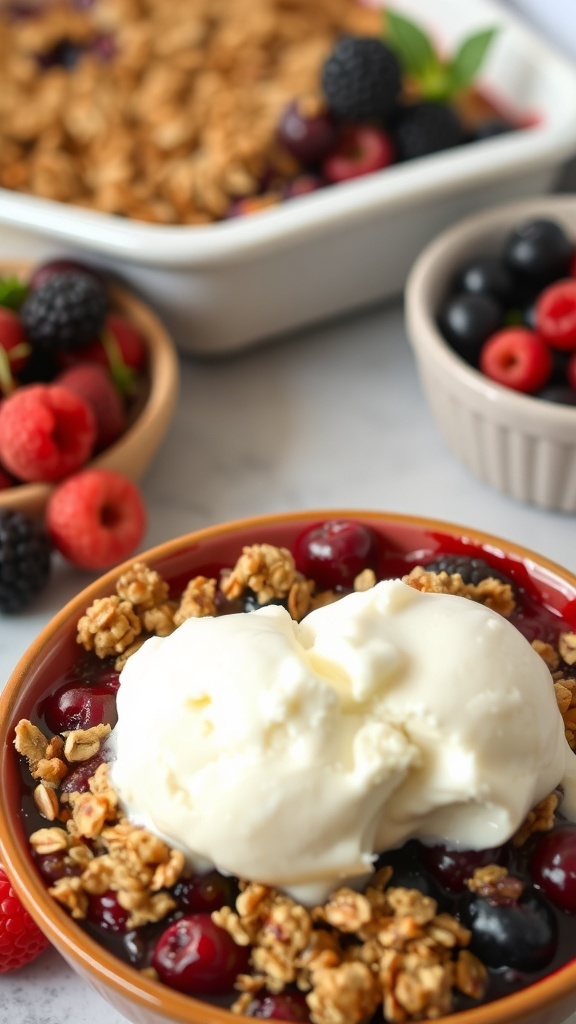
This berry crisp is a delightful dessert that brings a burst of freshness to your Thanksgiving table. The combination of juicy berries topped with a crunchy oat mixture is simply irresistible. It’s a great way to showcase seasonal fruits while keeping things budget-friendly.
The image captures a warm bowl of berry crisp, generously topped with a scoop of creamy vanilla ice cream. The vibrant colors of the berries shine through, making it a feast for the eyes as well as the palate. Surrounding the bowl are fresh berries, hinting at the deliciousness that awaits.
Making this dessert is straightforward and requires minimal ingredients. You can use a mix of your favorite berries, like blueberries, raspberries, and blackberries. The oat topping adds a satisfying crunch that perfectly complements the soft, sweet filling.
Serve this berry crisp warm, ideally with a scoop of ice cream or a dollop of whipped cream. It’s a simple yet impressive dessert that will surely please your guests without straining your budget.
Ingredients
- 2 cups mixed berries (fresh or frozen)
- 1 cup oats
- 1/2 cup brown sugar
- 1/4 cup all-purpose flour
- 1/4 cup unsalted butter, melted
- 1 teaspoon cinnamon
- 1 tablespoon lemon juice
- Pinch of salt
Instructions
- Preheat your oven to 350°F (175°C).
- In a mixing bowl, combine the mixed berries, lemon juice, and half of the brown sugar. Spread this mixture evenly in a baking dish.
- In another bowl, mix the oats, remaining brown sugar, flour, cinnamon, and salt. Pour in the melted butter and stir until crumbly.
- Sprinkle the oat mixture over the berry layer in the baking dish.
- Bake for 25-30 minutes, or until the topping is golden brown and the berries are bubbling.
- Let it cool slightly before serving, and top with ice cream if desired.
Easy Vanilla Pudding With A Touch Of Whimsy
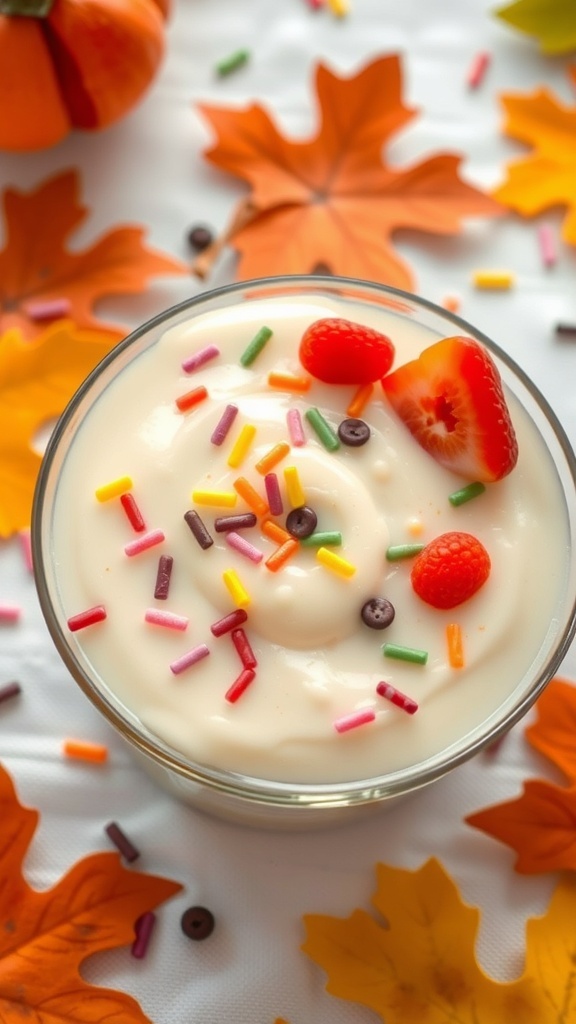
This easy vanilla pudding is a delightful treat that adds a playful twist to your Thanksgiving dessert table. With its creamy texture and sweet flavor, it’s sure to impress your guests without straining your budget. The pudding is topped with colorful sprinkles and fresh fruit, making it visually appealing and fun for all ages.
To make this dessert even more festive, serve it in clear cups or bowls to showcase the layers. The vibrant colors of the toppings against the soft white pudding create a cheerful presentation that captures the spirit of the holiday.
Gather your ingredients and get ready to whip up this simple yet charming dessert that everyone will love!
Ingredients
- 2 cups whole milk
- 1/2 cup granulated sugar
- 1/4 cup cornstarch
- 1/4 teaspoon salt
- 2 teaspoons vanilla extract
- 1 tablespoon unsalted butter
- Fresh fruit for topping (like strawberries and raspberries)
- Colorful sprinkles
Instructions
- In a medium saucepan, whisk together the sugar, cornstarch, and salt.
- Gradually add the milk, whisking until smooth. Cook over medium heat, stirring constantly until the mixture thickens and starts to bubble.
- Remove from heat and stir in the vanilla extract and butter until melted and well combined.
- Pour the pudding into serving dishes and let it cool for about 30 minutes. Cover with plastic wrap to prevent a skin from forming.
- Once cooled, top with fresh fruit and colorful sprinkles before serving.
Comments
Post a Comment