- Get link
- X
- Other Apps
17 Quick and Easy No Bake Desserts Ready in 10 Minutes or Less
If you’re short on time but still crave something sweet, this collection of quick and easy no-bake desserts is just what you need! Each recipe takes 10 minutes or less to whip up, making dessert a breeze even on the busiest weeknights. Get ready to satisfy your sweet tooth without the fuss of baking!
Refreshing No-Bake Strawberry Cheesecake
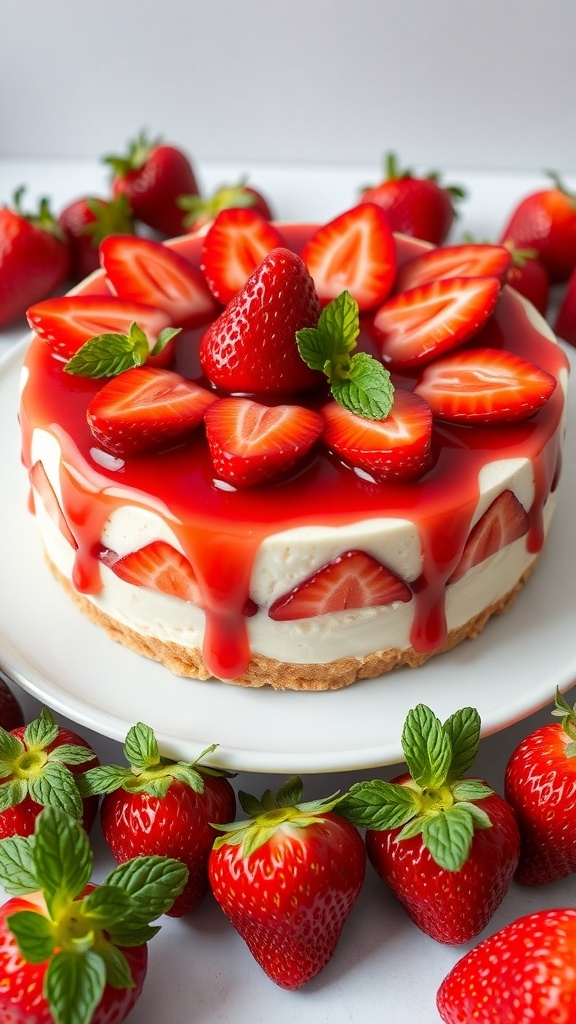
This no-bake strawberry cheesecake is a delightful treat that’s perfect for busy weeknights. With its creamy texture and fresh strawberry topping, it’s a refreshing dessert that everyone will love. The vibrant red strawberries not only add a pop of color but also bring a sweet and tangy flavor that complements the rich cheesecake.
The best part? You can whip this up in just 10 minutes! No baking required means you can spend more time enjoying your evening and less time in the kitchen. Plus, it’s a great way to use fresh strawberries, making it a seasonal favorite.
Gather your ingredients and get ready to impress your family or guests with this easy dessert. It’s light, fluffy, and oh-so-delicious!
Ingredients
- 1 ½ cups graham cracker crumbs
- ½ cup unsalted butter, melted
- 2 cups cream cheese, softened
- 1 cup powdered sugar
- 1 teaspoon vanilla extract
- 1 cup heavy whipping cream
- 2 cups fresh strawberries, sliced
- 1 cup strawberry glaze (store-bought or homemade)
Instructions
- Make the Crust: In a bowl, combine graham cracker crumbs and melted butter. Press the mixture into the bottom of a 9-inch springform pan to form the crust.
- Prepare the Filling: In another bowl, beat the cream cheese until smooth. Gradually add powdered sugar and vanilla extract, mixing until well combined.
- Whip the Cream: In a separate bowl, whip the heavy cream until stiff peaks form. Gently fold the whipped cream into the cream cheese mixture until combined.
- Assemble the Cheesecake: Pour the filling over the crust in the springform pan. Smooth the top with a spatula. Refrigerate for at least 4 hours, or until set.
- Top with Strawberries: Once set, arrange the sliced strawberries on top of the cheesecake. Drizzle with strawberry glaze for a beautiful finish.
- Serve and Enjoy: Carefully remove the cheesecake from the springform pan, slice, and serve chilled.
Simple Peanut Butter Chocolate Bars
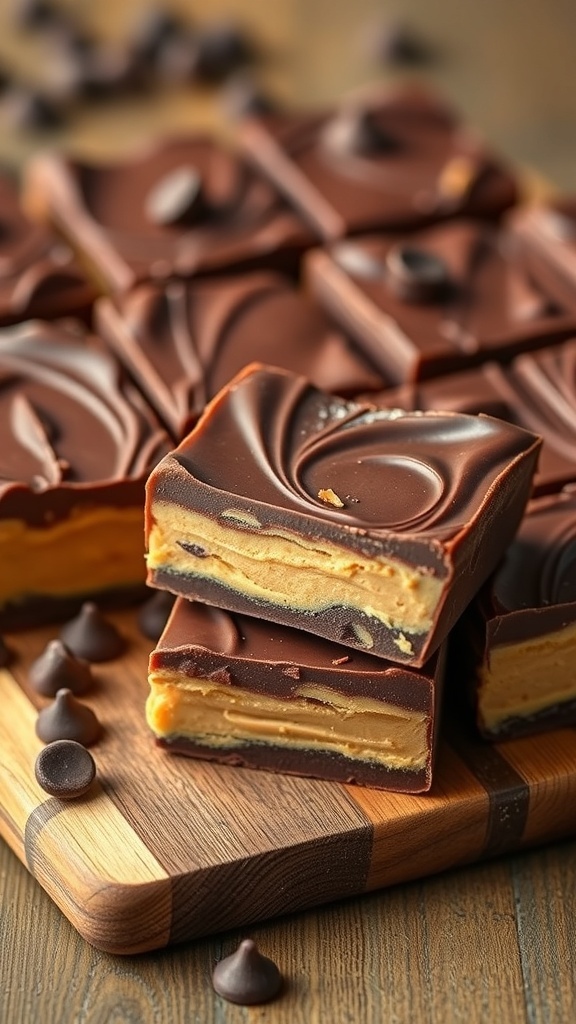
These Simple Peanut Butter Chocolate Bars are a delightful treat that comes together in no time. With layers of creamy peanut butter and rich chocolate, they are perfect for satisfying your sweet tooth after a busy day. The image showcases these bars stacked neatly, highlighting their smooth, glossy chocolate top and the inviting peanut butter layer peeking through. Each bite offers a perfect balance of flavors that everyone will love.
Making these bars is a breeze. You only need a few ingredients, and the steps are quick and straightforward. They require no baking, making them ideal for those hectic weeknights when you want something sweet without the fuss.
Ingredients
- 1 cup creamy peanut butter
- 1/2 cup unsalted butter, melted
- 1 cup powdered sugar
- 1 cup graham cracker crumbs
- 1 1/2 cups semi-sweet chocolate chips
- 1 tablespoon coconut oil (optional)
Instructions
- Mix the Base: In a large bowl, combine melted butter, peanut butter, powdered sugar, and graham cracker crumbs. Stir until well blended.
- Press into Pan: Line an 8x8 inch baking dish with parchment paper. Press the peanut butter mixture evenly into the bottom of the dish.
- Melt the Chocolate: In a microwave-safe bowl, combine chocolate chips and coconut oil. Microwave in 30-second intervals, stirring in between, until smooth.
- Spread the Chocolate: Pour the melted chocolate over the peanut butter layer and spread evenly.
- Chill: Refrigerate for at least 1 hour or until the chocolate is set. Cut into squares and enjoy!
Quick And Creamy Key Lime Pie Cups
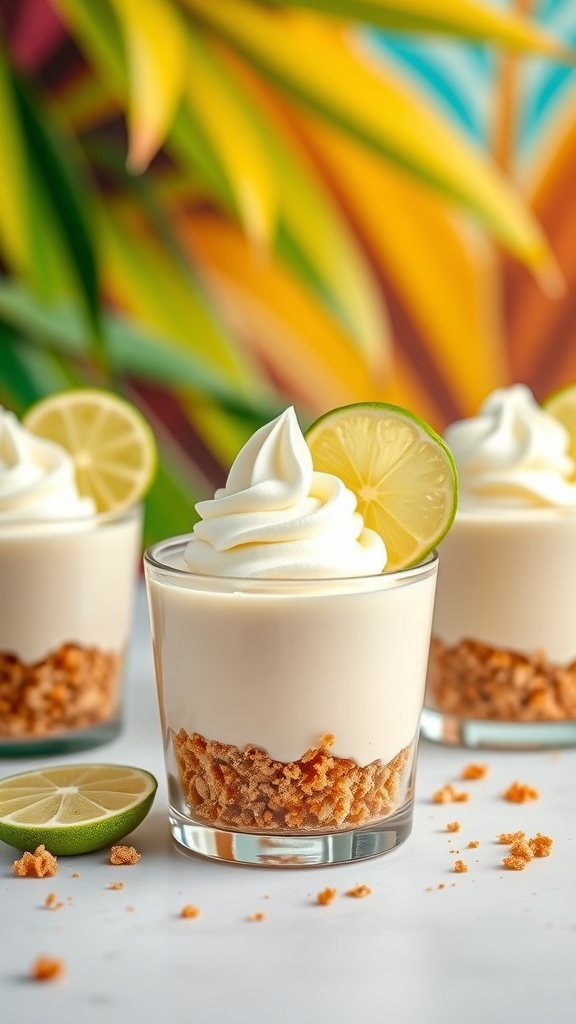
These Key Lime Pie Cups are a delightful treat that brings the flavors of a classic dessert into a quick and easy format. Perfect for busy weeknights, these cups are creamy, tangy, and oh-so-satisfying. The bright lime flavor paired with a crunchy graham cracker crust makes for a refreshing dessert that everyone will love.
Making these cups is a breeze. You’ll layer a simple graham cracker crust with a luscious key lime filling and top it off with whipped cream. They’re not just tasty; they also look great on the table, making them perfect for any occasion.
Gather your ingredients, and let’s whip up these delicious Key Lime Pie Cups!
Ingredients
- 1 cup graham cracker crumbs
- 1/4 cup granulated sugar
- 1/4 cup unsalted butter, melted
- 1 cup cream cheese, softened
- 1/2 cup sweetened condensed milk
- 1/4 cup fresh lime juice
- 1 teaspoon lime zest
- 1 cup whipped cream
- Lime slices for garnish
Instructions
- Prepare the Crust: In a bowl, mix graham cracker crumbs, sugar, and melted butter until combined. Press the mixture into the bottom of serving cups to form the crust.
- Make the Filling: In another bowl, beat the cream cheese until smooth. Add the sweetened condensed milk, lime juice, and lime zest. Mix until well combined.
- Layer the Cups: Spoon the key lime filling over the graham cracker crust in each cup. Smooth the top with a spatula.
- Chill: Refrigerate the cups for at least 30 minutes to allow the flavors to meld and the filling to set.
- Serve: Top with whipped cream and garnish with lime slices before serving. Enjoy your quick and creamy Key Lime Pie Cups!
Indulgent No-Bake Oreo Truffles

Oreo truffles are a delightful treat that combines the rich flavor of chocolate with the beloved taste of Oreos. These little bites are perfect for busy weeknights when you want something sweet without spending hours in the kitchen. Just look at that glossy chocolate coating and the sprinkle of crushed Oreos on top! They’re not only easy to make, but they also look impressive on any dessert table.
Making these truffles is a breeze. You only need a few ingredients, and the process takes less than 10 minutes. Simply crush the Oreos, mix them with cream cheese, roll them into balls, and dip them in melted chocolate. It’s that simple! You can even customize them by adding different toppings or flavors.
These truffles pair perfectly with a glass of milk, making them a great after-dinner treat or a fun snack for movie night. Everyone will love these indulgent bites!
Ingredients
- 1 package (15.35 oz) Oreo cookies
- 8 oz cream cheese, softened
- 1 cup semi-sweet chocolate chips
- 1 tablespoon vegetable oil (optional)
- Extra crushed Oreos for topping
Instructions
- Crush the Oreos: Place the Oreo cookies in a food processor and pulse until finely crushed. Alternatively, you can place them in a zip-top bag and crush them with a rolling pin.
- Mix with Cream Cheese: In a bowl, combine the crushed Oreos with softened cream cheese. Mix until well combined and a dough forms.
- Form the Truffles: Scoop out small portions of the mixture and roll them into balls, about 1 inch in diameter. Place them on a baking sheet lined with parchment paper.
- Melt the Chocolate: In a microwave-safe bowl, melt the chocolate chips in 30-second intervals, stirring in between until smooth. If desired, add vegetable oil to thin the chocolate.
- Dip the Truffles: Using a fork, dip each truffle into the melted chocolate, allowing excess chocolate to drip off. Place them back on the parchment paper.
- Top with Crushed Oreos: While the chocolate is still wet, sprinkle the tops with extra crushed Oreos for decoration.
- Chill: Refrigerate the truffles for about 30 minutes, or until the chocolate is set. Enjoy!
Easy Fruit And Yogurt Parfaits
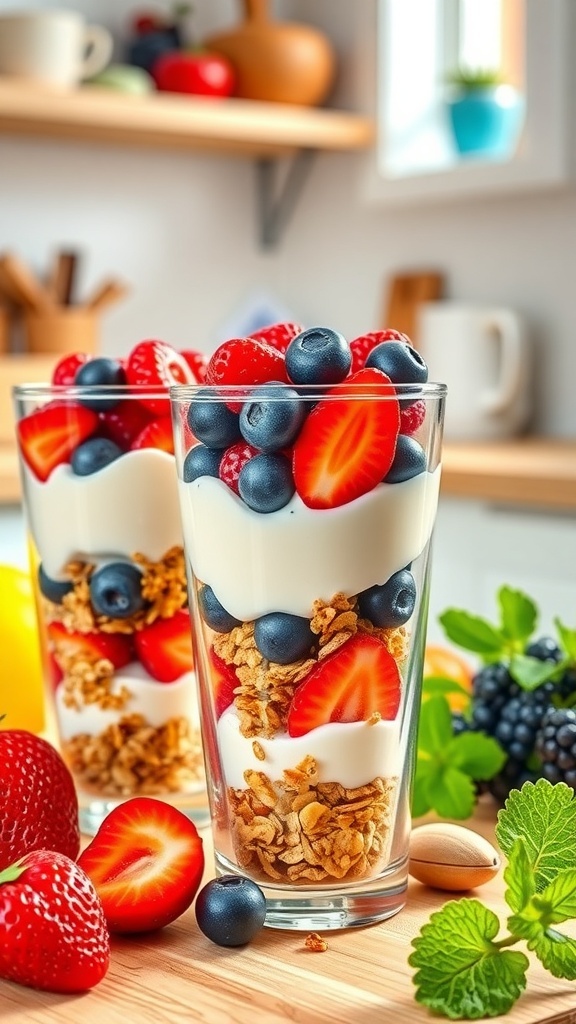
Fruit and yogurt parfaits are a delightful way to enjoy a quick dessert. They look beautiful and taste even better! With layers of creamy yogurt, fresh fruit, and crunchy granola, these parfaits are perfect for busy weeknights.
To make these, simply grab your favorite fruits. Strawberries, blueberries, and blackberries work wonderfully. Layer them with yogurt and granola in a glass. The colors create an appealing look, making it a treat for both the eyes and the taste buds.
These parfaits are not just tasty; they are also healthy. Yogurt provides protein and probiotics, while fruits add vitamins and antioxidants. Plus, they can be made in just a few minutes!
Ingredients
- 2 cups yogurt (plain or flavored)
- 1 cup granola
- 1 cup mixed berries (strawberries, blueberries, blackberries)
- Honey or maple syrup (optional, for sweetness)
Instructions
- Start by washing the berries. Slice the strawberries if they are large.
- In a glass, layer a spoonful of yogurt at the bottom.
- Add a layer of granola on top of the yogurt.
- Next, add a layer of mixed berries.
- Repeat the layers until the glass is full, finishing with berries on top.
- If desired, drizzle honey or maple syrup for extra sweetness.
- Serve immediately and enjoy your delicious parfait!
Luscious Chocolate Pudding Cups
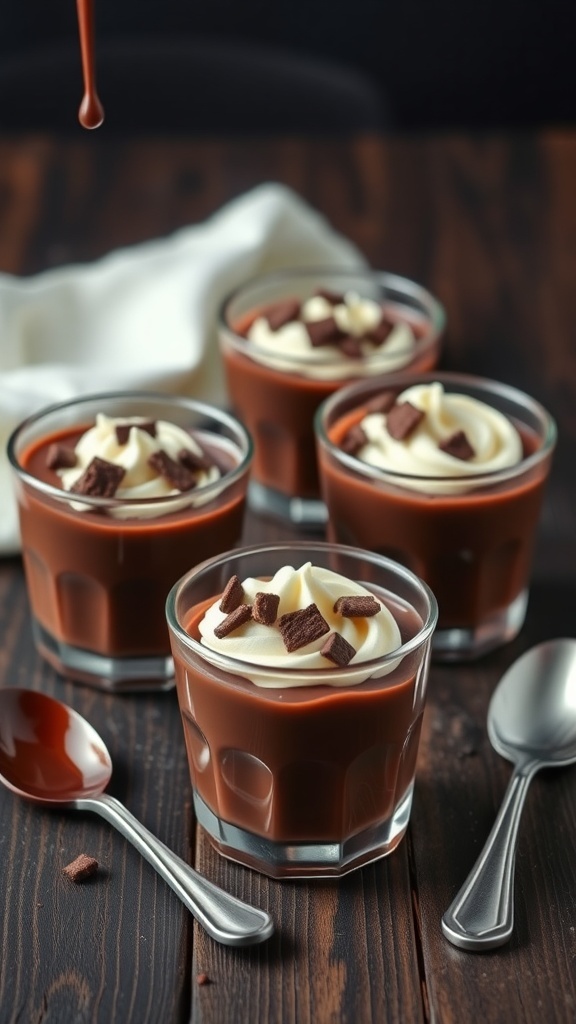
Chocolate pudding cups are a delightful treat that can be whipped up in no time. They are perfect for busy weeknights when you crave something sweet but don’t want to spend hours in the kitchen. These cups are rich, creamy, and topped with a swirl of whipped cream and chocolate shavings, making them a hit for both kids and adults.
To make these pudding cups, you only need a few simple ingredients. The best part? You can have them ready in just 10 minutes! Just mix, chill, and enjoy. They are versatile too; feel free to add your favorite toppings like nuts or fresh berries for an extra touch.
Ingredients
- 2 cups milk
- 1/2 cup granulated sugar
- 1/3 cup unsweetened cocoa powder
- 1/4 cup cornstarch
- 1/4 teaspoon salt
- 1 teaspoon vanilla extract
- Whipped cream for topping
- Chocolate shavings for garnish
Instructions
- In a medium saucepan, whisk together the sugar, cocoa powder, cornstarch, and salt.
- Gradually add the milk while whisking to combine. Cook over medium heat, stirring constantly until the mixture thickens and starts to bubble.
- Remove from heat and stir in the vanilla extract.
- Pour the pudding into serving cups and let it cool for a few minutes. Then, refrigerate for at least 1 hour until set.
- Before serving, top with whipped cream and sprinkle chocolate shavings on top.
No-Bake Coconut Cream Pie
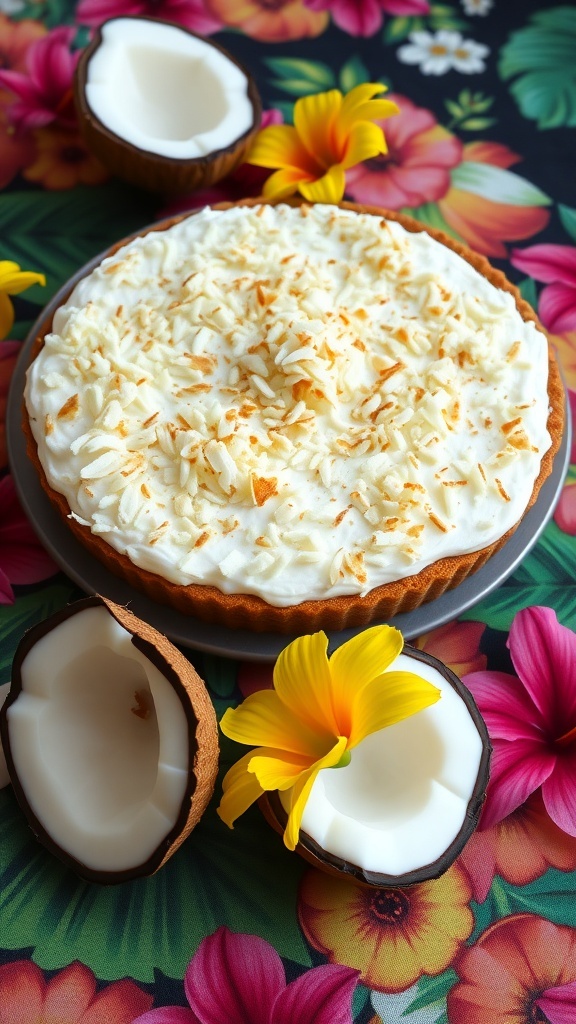
No-bake coconut cream pie is a delightful dessert that’s perfect for busy weeknights. This pie features a creamy coconut filling topped with fluffy whipped cream and toasted coconut flakes. It’s simple to make and requires no baking, making it an ideal choice when you want something sweet without the fuss.
The image shows a beautifully presented coconut cream pie, garnished with toasted coconut and vibrant flowers. The pie sits on a colorful floral background, adding a cheerful touch to the scene. The combination of the creamy filling and the crunchy topping makes this dessert a crowd-pleaser.
To whip up this delicious treat, you’ll need just a few ingredients and about 10 minutes of your time. It’s a great way to satisfy your sweet tooth without spending hours in the kitchen.
Ingredients
- 1 pre-made graham cracker crust
- 1 cup coconut milk
- 1 cup heavy cream
- 1/2 cup powdered sugar
- 1/2 cup shredded coconut (toasted)
- 1 teaspoon vanilla extract
- 1 tablespoon cornstarch
Instructions
- In a medium saucepan, combine coconut milk, powdered sugar, and cornstarch. Cook over medium heat, stirring constantly until the mixture thickens.
- Remove from heat and stir in vanilla extract and half of the toasted coconut. Let it cool for a few minutes.
- In a separate bowl, whip the heavy cream until soft peaks form. Gently fold the whipped cream into the coconut mixture.
- Pour the filling into the graham cracker crust and smooth the top. Refrigerate for at least 2 hours to set.
- Before serving, top with the remaining toasted coconut and enjoy!
Quick And Easy Chocolate Peanut Butter Dip
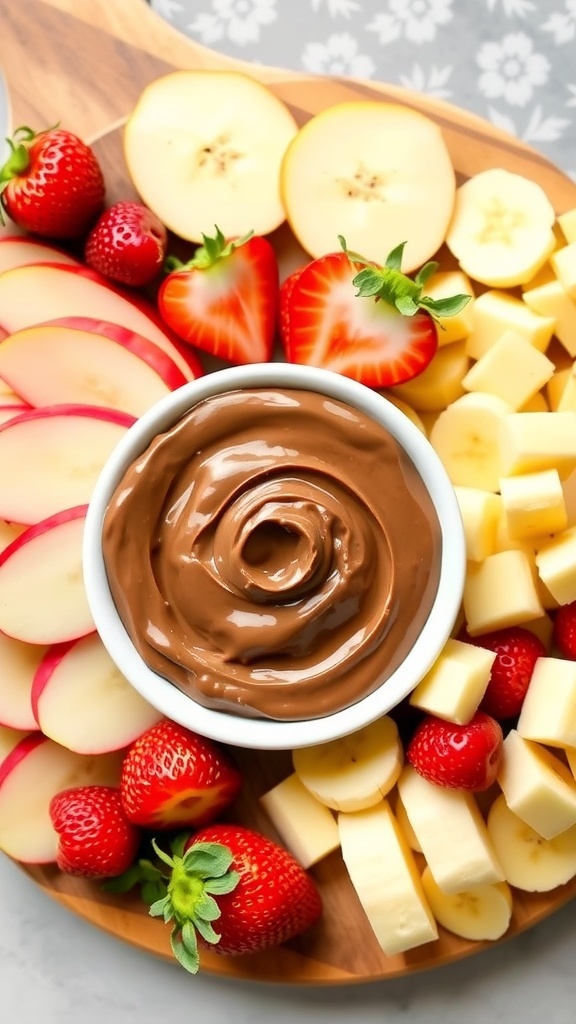
Chocolate and peanut butter are a match made in heaven, and this dip is proof! Perfect for busy weeknights, it takes just minutes to whip up. You can enjoy it with fresh fruits like strawberries and apples, or even with some crunchy pretzels. The creamy texture and rich flavor make it a hit for both kids and adults.
This dip is not only quick to prepare, but it also adds a fun twist to your snack time. Just picture a bowl of this luscious dip surrounded by colorful fruits and snacks. It’s an easy way to satisfy your sweet tooth without spending hours in the kitchen.
Ingredients
- 1 cup creamy peanut butter
- 1/2 cup powdered sugar
- 1/4 cup cocoa powder
- 1/2 cup cream cheese, softened
- 1 teaspoon vanilla extract
- 1/4 cup milk (or more for desired consistency)
Instructions
- In a mixing bowl, combine the peanut butter, powdered sugar, cocoa powder, and softened cream cheese.
- Add the vanilla extract and milk, mixing until smooth. Adjust the milk for your preferred consistency.
- Serve in a bowl with an array of fruits and snacks for dipping.
- Enjoy your delicious chocolate peanut butter dip!
No-Bake Mint Chocolate Chip Cookies

These no-bake mint chocolate chip cookies are a delightful treat for any busy weeknight. They combine the refreshing taste of mint with rich chocolate, making them a perfect dessert for chocolate lovers. The vibrant green from the mint gives these cookies a fun twist, and they are incredibly easy to whip up in just a few minutes.
Imagine coming home after a long day and having a sweet, minty dessert ready in no time. These cookies are not only quick to make, but they also require no baking, saving you time and effort. Just mix, chill, and enjoy!
Ingredients
- 1 cup almond flour
- 1/2 cup unsweetened cocoa powder
- 1/4 cup maple syrup
- 1/4 cup coconut oil, melted
- 1 teaspoon peppermint extract
- 1/2 cup dark chocolate chips
- Pinch of salt
Instructions
- Mix Ingredients: In a large bowl, combine almond flour, cocoa powder, maple syrup, melted coconut oil, peppermint extract, and a pinch of salt. Stir until well combined.
- Add Chocolate Chips: Fold in the dark chocolate chips until evenly distributed throughout the mixture.
- Form Cookies: Scoop out small portions of the mixture and roll them into balls. Flatten them slightly to form cookie shapes.
- Chill: Place the cookies on a parchment-lined tray and refrigerate for at least 30 minutes to firm up.
- Serve: Enjoy your mint chocolate chip cookies chilled or at room temperature!
Delicious No-Bake Energy Bites
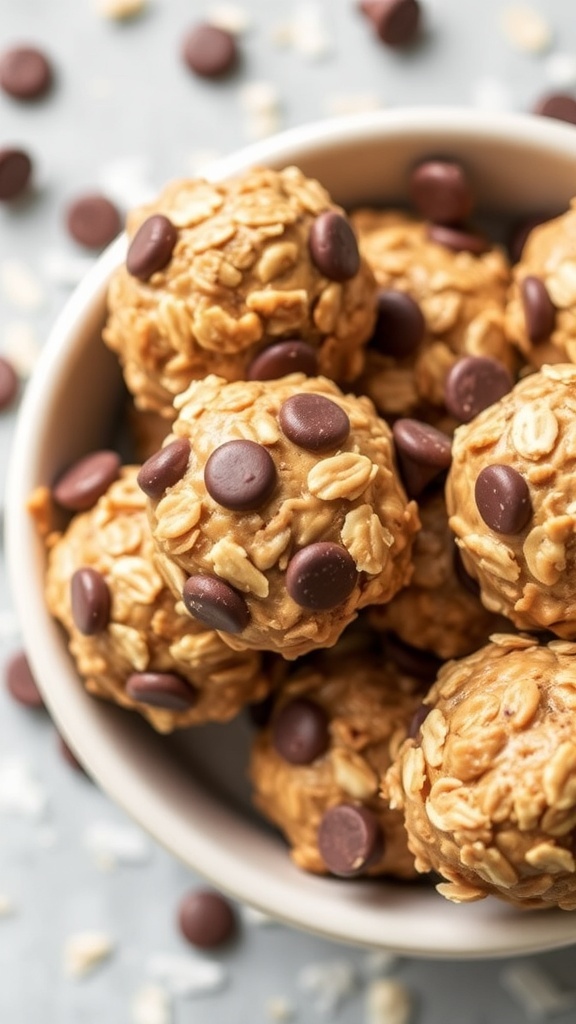
No-bake energy bites are a fantastic treat for busy weeknights. They are quick to make and packed with flavor. These little balls of goodness are perfect for a snack or a sweet pick-me-up. Plus, they take just 10 minutes or less to whip up!
Imagine a bowl filled with chewy oats, creamy peanut butter, and a sprinkle of chocolate chips. That’s what you get with these energy bites. They are not only delicious but also nutritious. You can customize them with your favorite ingredients, making them a versatile option for everyone.
These bites are great for kids and adults alike. They are perfect for after-school snacks or a quick energy boost before a workout. You can easily store them in the fridge for a grab-and-go treat anytime you need a little something sweet.
Ingredients
- 1 cup rolled oats
- 1/2 cup peanut butter
- 1/3 cup honey
- 1/2 cup chocolate chips
- 1/2 cup ground flaxseed (optional)
- 1 teaspoon vanilla extract
Instructions
- In a large bowl, mix together the rolled oats, peanut butter, honey, and vanilla extract until well combined.
- Add in the chocolate chips and flaxseed, if using. Stir until everything is evenly mixed.
- Using your hands, roll the mixture into small balls, about 1 inch in diameter.
- Place the energy bites on a baking sheet lined with parchment paper.
- Refrigerate for at least 30 minutes to firm up. Enjoy your delicious no-bake energy bites!
Savory No-Bake Chocolate Biscuit Cake
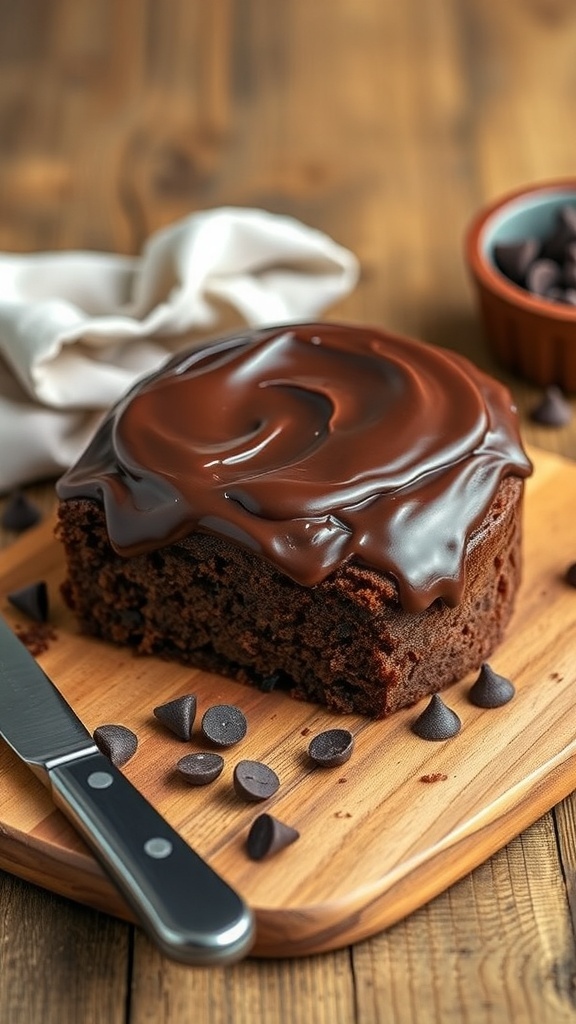
This Savory No-Bake Chocolate Biscuit Cake is a delightful treat that’s perfect for busy weeknights. With its rich chocolate flavor and easy preparation, it’s sure to satisfy your sweet cravings without the fuss of baking. The cake features layers of crushed biscuits combined with a luscious chocolate mixture, topped with a smooth chocolate glaze. It’s a simple yet indulgent dessert that can be whipped up in no time.
To make this cake, you’ll need just a few ingredients. The combination of chocolate and biscuits creates a satisfying texture that melts in your mouth. Plus, it’s a great way to use up any leftover biscuits you might have. This recipe is perfect for those evenings when you want something sweet but don’t have the time to bake.
Let’s get started on this quick and easy dessert!
Ingredients
- 200g digestive biscuits
- 100g unsalted butter, melted
- 200g dark chocolate, chopped
- 100ml heavy cream
- 2 tablespoons powdered sugar
- Chocolate chips for topping
Instructions
- Prepare the Base: Crush the digestive biscuits into fine crumbs. In a bowl, mix the crumbs with melted butter until well combined.
- Make the Chocolate Mixture: In a saucepan, heat the heavy cream until it’s just about to boil. Remove from heat and add the chopped dark chocolate. Stir until smooth and glossy.
- Combine: In a large bowl, mix the biscuit crumbs with the chocolate mixture. Stir until everything is well coated.
- Set the Cake: Press the mixture into a lined square baking dish. Smooth the top with a spatula and refrigerate for at least 30 minutes to set.
- Finish: Once set, melt any remaining chocolate and pour it over the top. Sprinkle with chocolate chips for added texture.
- Serve: Cut into squares and enjoy your delicious no-bake chocolate biscuit cake!
Sweet Berry And Cream Cheese Roll-Ups
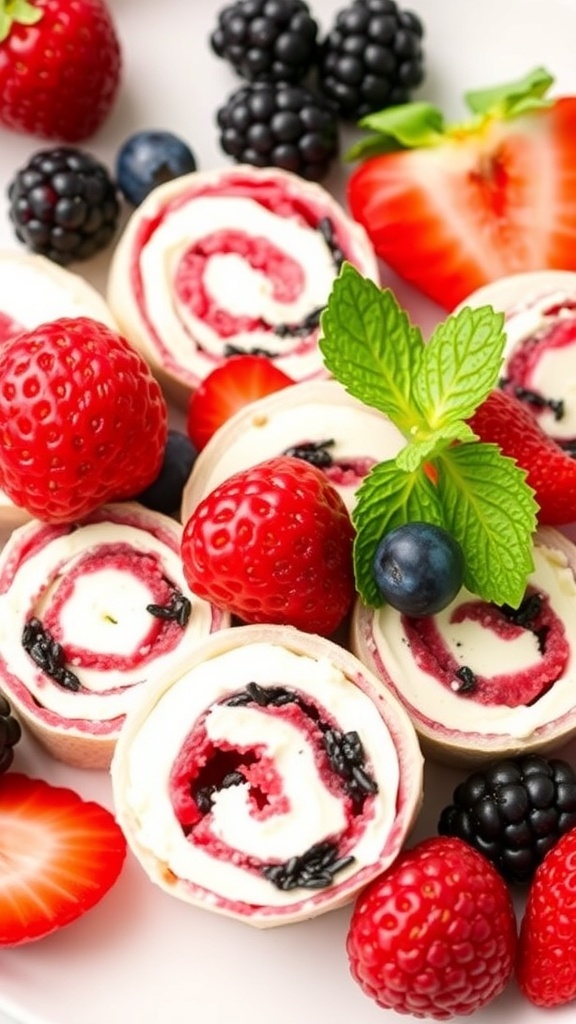
Sweet Berry and Cream Cheese Roll-Ups are a fun and easy dessert that everyone will love. These delightful treats are perfect for busy weeknights when you want something quick yet satisfying. The combination of fresh berries and creamy filling makes them a hit for both kids and adults.
To make these roll-ups, you’ll need some simple ingredients. Start with tortillas, cream cheese, and a variety of berries like strawberries, blueberries, and raspberries. The beauty of this recipe is its flexibility; you can use whatever berries you have on hand!
Begin by spreading a layer of cream cheese on the tortilla. Then, add your choice of berries and roll it up tightly. Slice into bite-sized pieces, and you have a sweet treat ready in no time. These roll-ups are not only delicious but also visually appealing, making them a great addition to any dessert table.
Ingredients
- 4 large flour tortillas
- 8 oz cream cheese, softened
- 1/4 cup powdered sugar
- 1 teaspoon vanilla extract
- 1 cup strawberries, sliced
- 1 cup blueberries
- 1 cup raspberries
- Fresh mint leaves for garnish (optional)
Instructions
- In a bowl, mix the softened cream cheese, powdered sugar, and vanilla extract until smooth.
- Spread an even layer of the cream cheese mixture over each tortilla.
- Arrange the sliced strawberries, blueberries, and raspberries on top of the cream cheese.
- Roll each tortilla tightly and slice into bite-sized pieces.
- Garnish with fresh mint leaves if desired. Serve immediately or refrigerate until ready to enjoy.
Rich And Creamy No-Bake Tiramisu
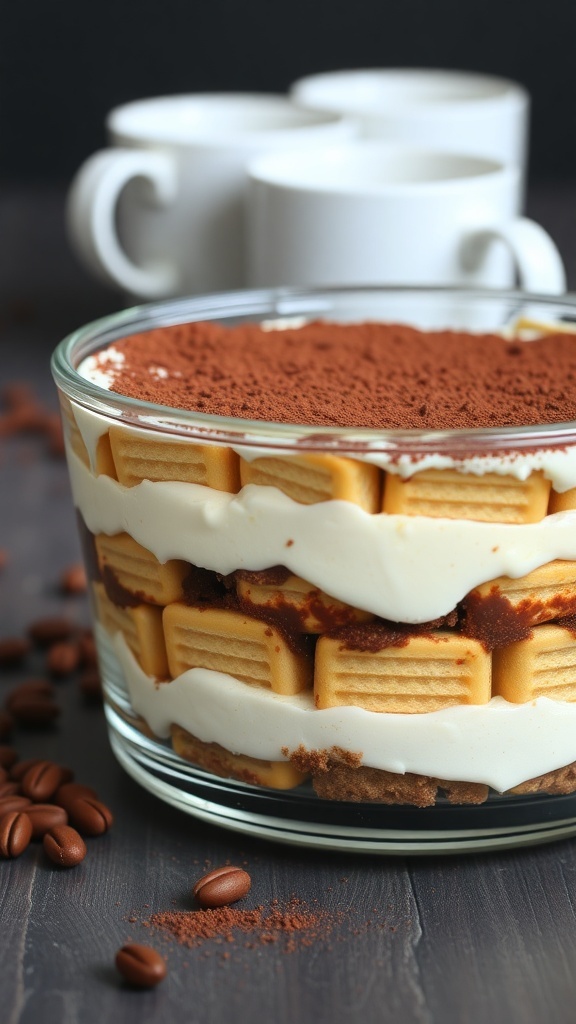
No-bake tiramisu is a delightful treat that captures the essence of classic Italian dessert without the fuss of baking. This version is rich and creamy, making it perfect for busy weeknights. The layers of coffee-soaked ladyfingers and smooth mascarpone cheese create a heavenly combination. Plus, it’s ready in just 10 minutes!
The image showcases a beautiful glass dish filled with layers of tiramisu. You can see the golden ladyfingers peeking through the creamy filling, topped with a dusting of cocoa powder. It’s not just a feast for the taste buds but also for the eyes. The coffee beans scattered around add a nice touch, hinting at the coffee flavor that ties everything together.
Making this dessert is super easy. Just gather your ingredients, layer them in a dish, and let it chill. You’ll have a delicious dessert ready to impress your family or guests!
Ingredients
- 1 cup strong brewed coffee, cooled
- 2 tablespoons coffee liqueur (optional)
- 8 ounces mascarpone cheese
- 1 cup heavy cream
- 1/2 cup powdered sugar
- 1 teaspoon vanilla extract
- 24 ladyfingers
- Cocoa powder for dusting
Instructions
- Mix the Coffee: In a shallow dish, combine the cooled coffee and coffee liqueur.
- Whip the Cream: In a mixing bowl, whip the heavy cream, powdered sugar, and vanilla extract until soft peaks form.
- Combine: Gently fold the mascarpone cheese into the whipped cream until smooth.
- Layer: Dip each ladyfinger into the coffee mixture for a second, then layer them in a glass dish. Spread a layer of the mascarpone mixture over the ladyfingers.
- Repeat: Continue layering until all ingredients are used, finishing with the mascarpone mixture on top.
- Chill: Cover and refrigerate for at least 2 hours, or overnight for best flavor. Before serving, dust with cocoa powder.
Simple No-Bake Chocolate Chip Cookie Dough

Craving something sweet but short on time? This Simple No-Bake Chocolate Chip Cookie Dough is the perfect solution. Just picture a bowl filled with creamy, delicious cookie dough, studded with chocolate chips. It’s a treat that takes only minutes to whip up and requires no baking at all!
This recipe is a fantastic way to enjoy the classic cookie flavor without the wait. You can mix it up in no time, making it ideal for busy weeknights. Plus, it’s a fun activity to do with kids or friends. Just grab your ingredients and let’s get started!
Ingredients
- 1 cup all-purpose flour
- 1/2 cup unsalted butter, softened
- 1/2 cup brown sugar, packed
- 1/4 cup granulated sugar
- 1 teaspoon vanilla extract
- 1/2 cup chocolate chips
- 1/4 teaspoon salt
- 2 tablespoons milk (optional, for creaminess)
Instructions
- Mix the Base: In a large bowl, combine softened butter, brown sugar, and granulated sugar. Beat until smooth.
- Add Flavor: Stir in vanilla extract and salt until well combined.
- Incorporate Flour: Gradually add the flour, mixing until a dough forms. If you want a creamier texture, add the milk.
- Fold in Chocolate Chips: Gently fold in the chocolate chips until evenly distributed.
- Chill (Optional): If you prefer a firmer dough, chill in the refrigerator for about 30 minutes.
- Enjoy: Scoop out small portions and enjoy your no-bake cookie dough straight from the bowl or shape into balls!
Tasty No-Bake Apple Pie Cups

No-bake desserts are a lifesaver for busy weeknights, and these Tasty No-Bake Apple Pie Cups are a perfect example. They are quick, easy, and oh-so-delicious! Imagine creamy apple filling nestled in a sweet crust, topped with fluffy whipped cream. It’s like having a slice of apple pie in a cup!
These cups are not just visually appealing; they are packed with flavor. The combination of sweet apples, cinnamon, and a hint of vanilla makes every bite delightful. Plus, they require minimal effort and can be whipped up in just 10 minutes!
Gather your ingredients and let’s create this simple yet satisfying dessert. You’ll impress your family or guests without spending hours in the kitchen. Ready to dive into this sweet treat?
Ingredients
- 1 cup apple pie filling
- 1/2 teaspoon ground cinnamon
- 1/2 cup whipped cream
- 1/4 cup caramel sauce
- 4 mini graham cracker crusts
- 1 tablespoon chopped nuts (optional)
Instructions
- In a bowl, mix the apple pie filling with ground cinnamon until well combined.
- Take the mini graham cracker crusts and fill each one with the cinnamon apple mixture.
- Top each cup with a generous dollop of whipped cream.
- Drizzle caramel sauce over the whipped cream for extra sweetness.
- If desired, sprinkle chopped nuts on top for added crunch.
- Serve immediately or chill for a bit before enjoying!
Quick And Easy S'Mores Dip
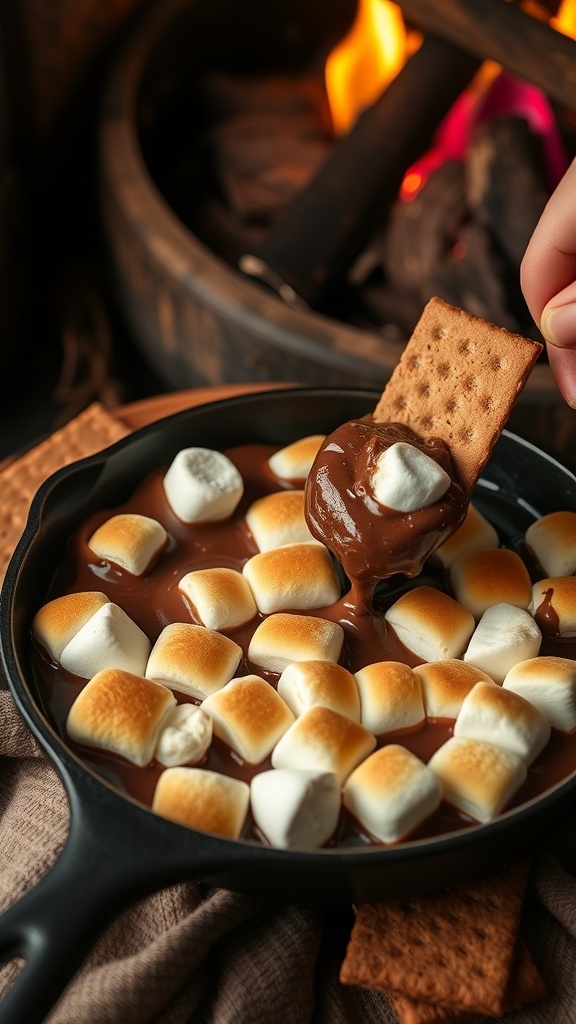
S'mores dip is a fun twist on the classic campfire treat. This dessert is perfect for busy weeknights when you want something sweet without the hassle of baking. The image shows a deliciously gooey mixture of melted chocolate and toasted marshmallows, ready to be scooped up with graham crackers. It’s simple, quick, and oh-so-satisfying!
To make this delightful dip, you only need a few ingredients. The combination of chocolate and marshmallows creates a rich flavor that everyone will love. Plus, it takes just minutes to prepare, making it ideal for those hectic evenings.
Gather your friends or family around and enjoy this easy treat. It’s perfect for sharing and will surely bring smiles all around!
Ingredients
- 1 cup chocolate chips
- 2 cups mini marshmallows
- Graham crackers, for dipping
Instructions
- Preheat your oven to 450°F (230°C).
- In a cast-iron skillet or oven-safe dish, spread the chocolate chips evenly on the bottom.
- Top the chocolate with mini marshmallows, covering them completely.
- Bake for about 5 minutes, or until the marshmallows are golden brown.
- Remove from the oven and let it cool slightly before serving.
- Serve warm with graham crackers for dipping.
Easy No-Bake Brownie Bites
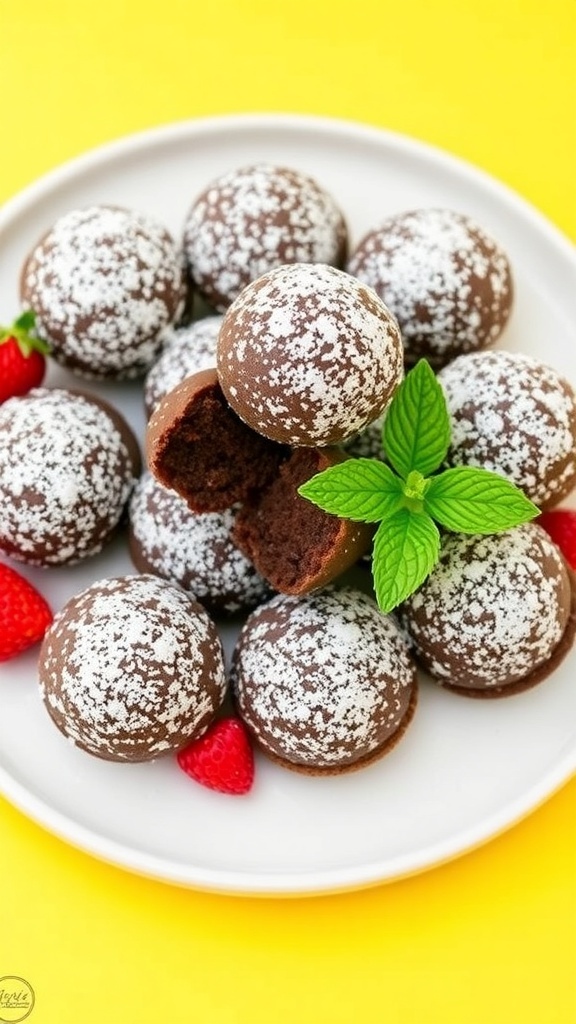
These easy no-bake brownie bites are a perfect treat for busy weeknights. They are quick to whip up and require no baking, making them ideal for those late-night cravings. The image shows a delightful plate of brownie bites, dusted with powdered sugar and garnished with fresh mint and strawberries. They look so tempting and are sure to impress anyone who tries them!
To make these brownie bites, you only need a few simple ingredients. The best part? You can customize them with your favorite toppings or mix-ins. Let’s get started!
Ingredients
- 1 cup chocolate cookie crumbs
- 1/2 cup unsweetened cocoa powder
- 1/2 cup sweetened condensed milk
- 1/4 cup melted butter
- 1 teaspoon vanilla extract
- Powdered sugar for dusting
- Fresh mint and strawberries for garnish
Instructions
- Mix the Ingredients: In a large bowl, combine chocolate cookie crumbs, cocoa powder, sweetened condensed milk, melted butter, and vanilla extract. Stir until everything is well combined.
- Form the Bites: Take small portions of the mixture and roll them into bite-sized balls. Place them on a baking sheet lined with parchment paper.
- Chill: Refrigerate the brownie bites for at least 30 minutes to firm them up.
- Dust and Serve: Once chilled, dust the brownie bites with powdered sugar. Garnish with fresh mint leaves and strawberries before serving.
Enjoy these delicious brownie bites as a quick dessert or a sweet snack anytime!
Comments
Post a Comment